Connecting Scheduler with kintone Apps
The kintone connector for Scheduler is a feature that integrates Garoon Scheduler with kintone apps.
The following functions will be available:
- Retrieve information from the kintone app when adding an appointment
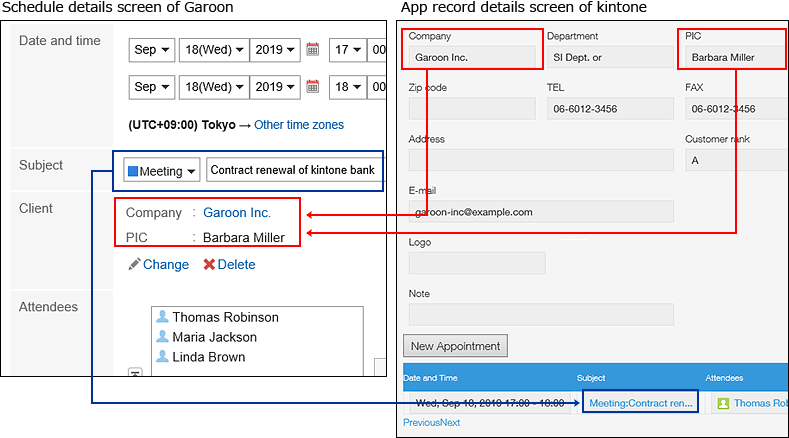
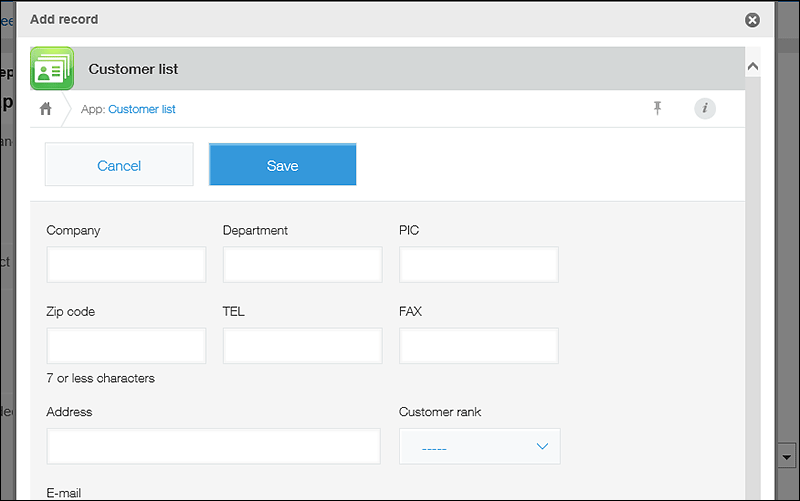
- Add records to the kintone apps when adding or changing appointments in Garoon
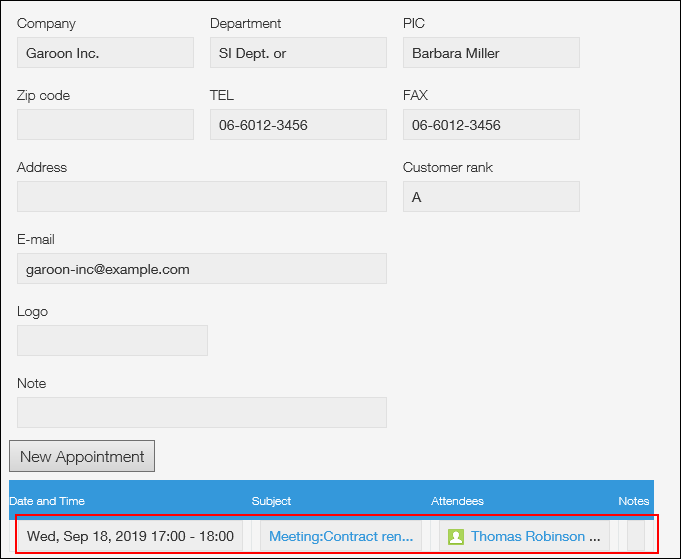
- Show appointments associated with Garoon Scheduler on the kintone record details screen
- Add appointments to Garoon from the kintone record details screen
For users to use this feature, the system administrator must complete the following settings- kintone: Adding/Deleting Plug-Ins (System Administration)
- kintone: Setting Up Garoon Scheduler Connector
- Garoon: Setting Up kintone Connector
For details, refer to kintone Connector Settings.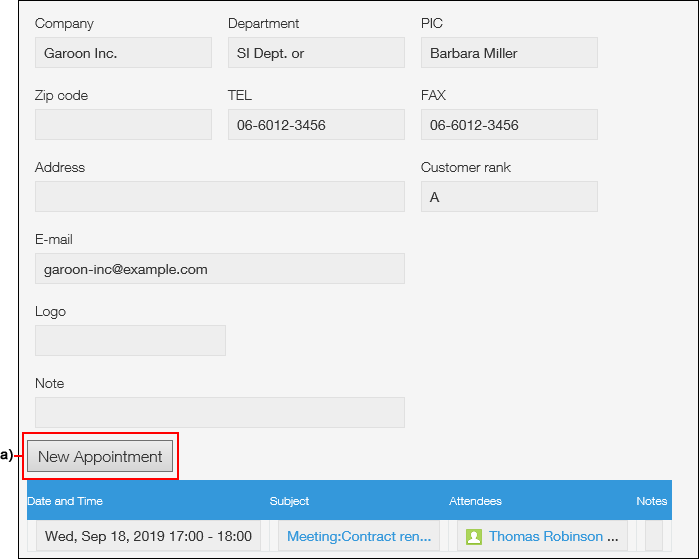 a): By clicking "New appointment", you can add appointments to Garoon Scheduler.
Adding an Appointment with Information Retrieved from the App
You can retrieve information from the kintone app on the "New appointment" screen to add an appointment.
The following example's description assumes that the "Project management" app is connected with an item called "Project", which is set under the appointment type "Visit":
-
Click the app icon
in the header.
-
Click Scheduler.
-
On the "Scheduler" screen, click the item to add appointments or the
 icon.
icon. -
On the "Add an Appointment" screen, select a regular appointment and set the date and time.
You can retrieve information from the kintone app only for regular appointments.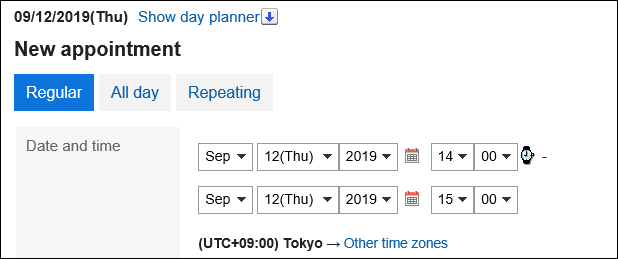
-
Select "Visit" in the appointment type that has kintone connector configured.
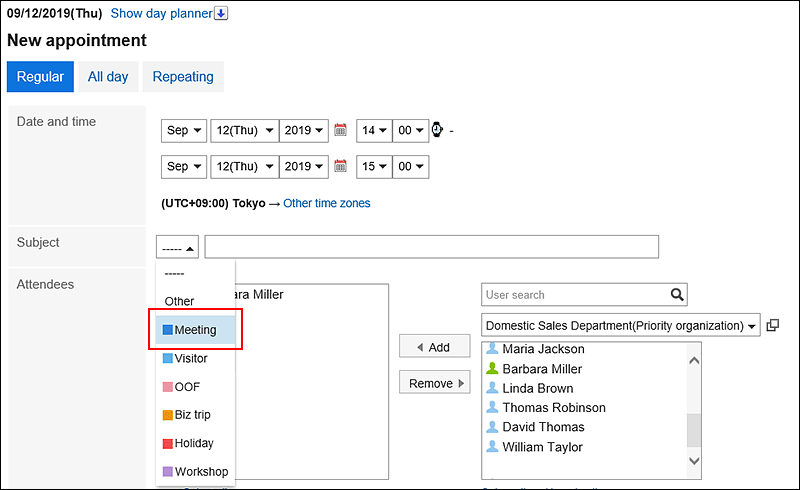 The "Project" field is displayed.
 -
In the "Project" field, click Add.
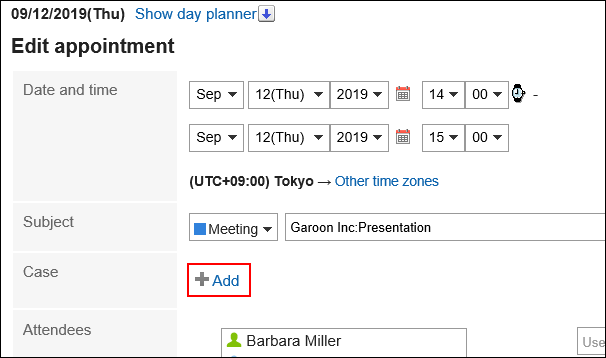
-
From the list of Project records, select the project to which you want to retrieve information, and then click "Retrieve".
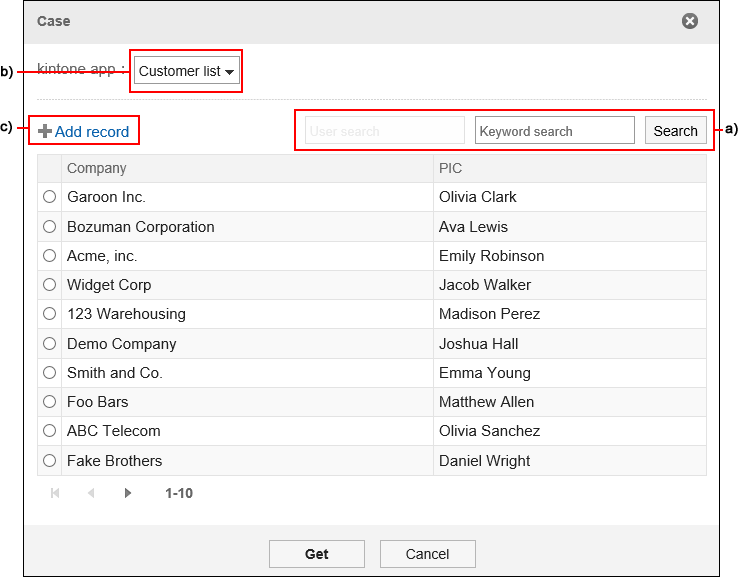 A): You can search for records by entering keywords in the search box in the upper right corner of the screen.
If the connected app has the "User selection" field, the user search box is also displayed. However, if you are not allowed to view the fields in the kintone app, the search function for records cannot be used.B): When multiple kintone apps are connected, you can select a kintone app to retrieve information from the dropdown list in the upper left corner of the screen.C): If the record you want to retrieve has not been registered, you can add records by clicking "Append Record" in the dialog box. The added record information is automatically displayed on the screen of the appointment. -
Confirm that the project that you have selected or added is displayed in the "Project" field on the "Add an appointment" screen.
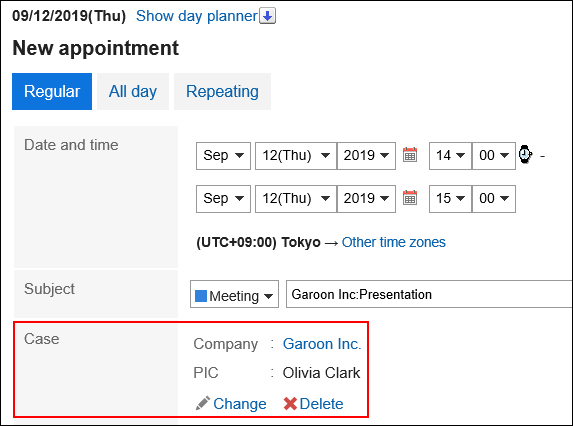
-
Set the required items, and click "Add".
Adding an Appointment to Garoon from kintone App Screen
From the kintone app record details screen, you can add an appointment with Garoon by associating it with a record.
You can add only regular appointments and cannot use the "Arrange appointments" feature.
Depending on your kintone system administrator settings, you may not be able to add an appointment from the record details screen.
The following example's description assumes that the "Project management" app is connected with an item called "Project", which is set under the appointment type "Visit":
-
In the "Project Management" app on kintone, open the details screen of the record you want to add an appointment to.
-
Click "Add an Appointment".
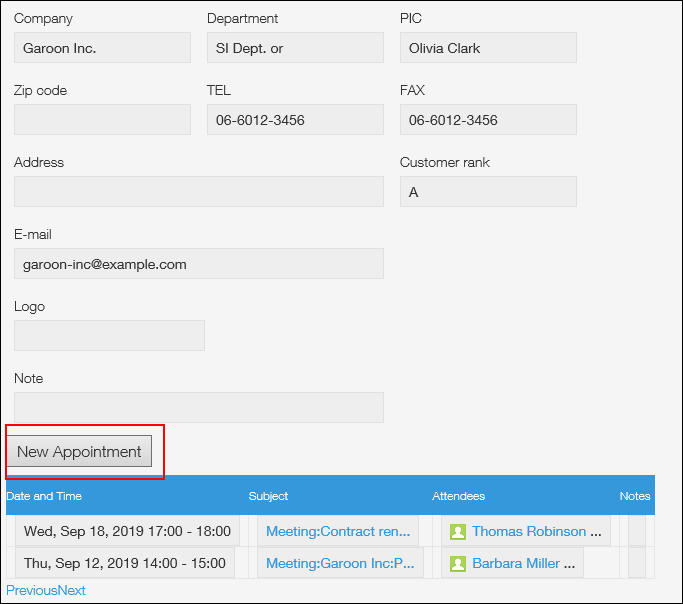
-
Set the required items, and click "Add".
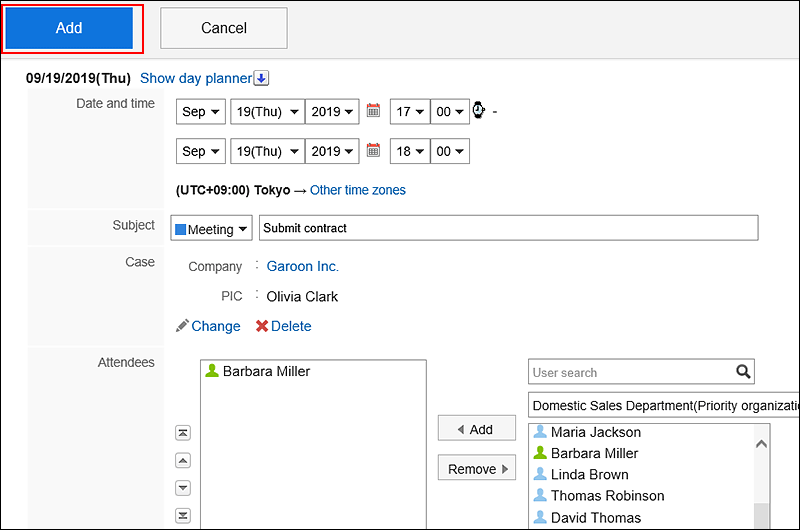
-
Confirm that the appointment you have added is displayed on the record Details screen.
When you click the title of an appointment, the "Appointment details" screen of Garoon is displayed.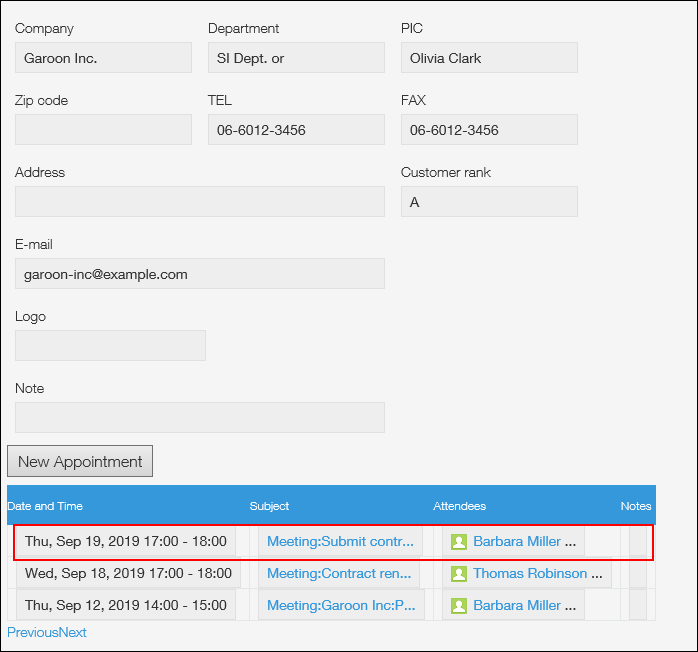
Changing to Retrieve Information from Another Record
You can change the settings to retrieve information from another record on the kintone app.
The following describes how to change the settings to retrieve information from another project in an example where the "Project management" app is connected with an item called "Project", which is set under the appointment type "Visit":
-
Click the app icon
in the header.
-
Click Scheduler.
-
On the "Appointment details" screen, click Edit.
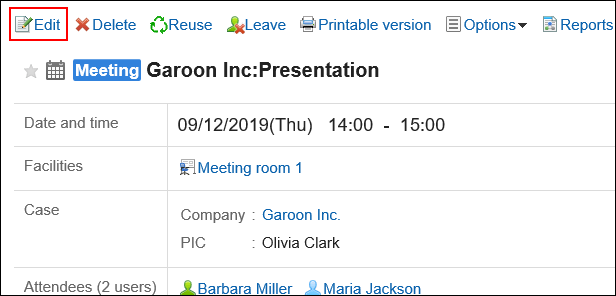
-
On the "Change Appointment" screen, click "Change" in the "Project" field.
If you no longer need to display the retrieved information, click "Delete".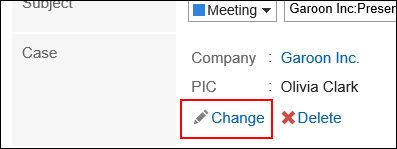
-
From the list of Project records, select the project to which you want to retrieve information, and then click "Retrieve".
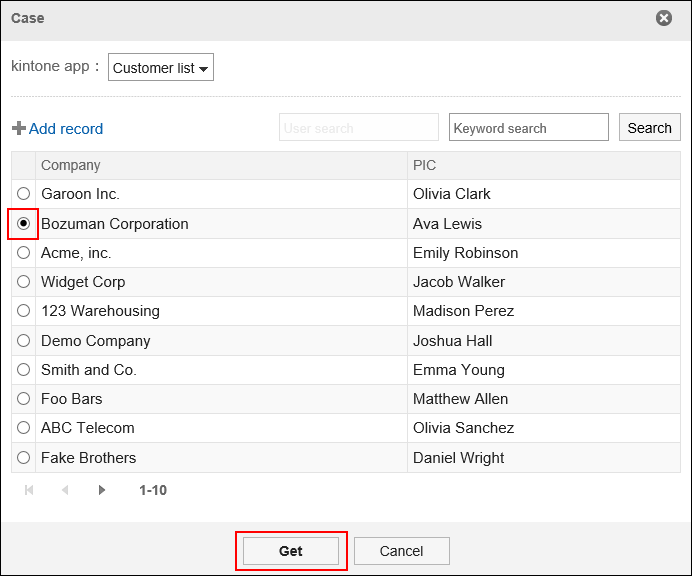
-
Confirm that the project you have selected is displayed in the "Project" field on the "Change appointment" screen.
-
Change the required items, and then click Save.