kintone Connector Settings
Configure kintone connector.
Up to 50 related items can be set.
Adding Related Item
Add related items.
The related items added are available only for regular appointments.
-
Click the Administration menu icon (gear icon) in the header.
The gear-shaped icon appears only on the screen for the users with administrative privileges. -
Click Garoon System Administration.
-
Select "Application settings" tab.
-
Click Scheduler.
-
Click kintone connector.
-
Click Add related items on the "kintone connector" screen.

-
On the "Add related item" screen, enter the "Item Name" field.
You must set a default item name.
Clicking "Add localized name" allows you to set item names in multiple languages.
If you do not set the item name in the user preference language, the default item name is displayed.
The following languages can be set:- 日本語
- English
- 中文(简体)
- 中文(繁體)
Displayed in Traditional Chinese.

-
Set "Related appointment type" field.
You can select one of the following options:
- Use in all appointments:
Users can retrieve information from configured kintone apps in all appointments if appointments are regular appointments.
- Add an appointment type:
Users can retrieve information from configured kintone apps only if they select added appointment type. To enable this item, clear the checkbox to use for all appointments. When you click the item to add an appointment type, the screen to add appointment types appears. You can add an appointment type to associate with by clicking "Add" on the screen to add appointment types.
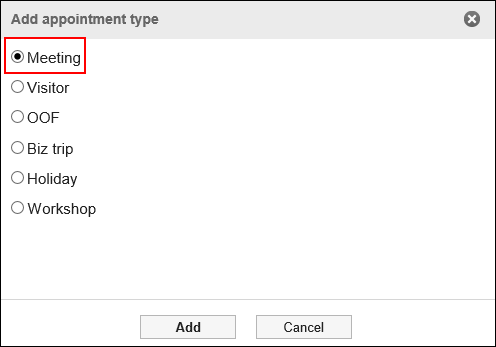 You can add multiple appointment types.

- Use in all appointments:
-
In the "kintone app" field, enter an app ID in "App ID".
Enter kintone app ID to be connected.
You can check the app ID at the kintone app URL.
The URL of the app consists of the following:https://(domain)/k/(app ID)/
Example:
https://www.example.com/k/15/You can configure up to 10 apps. Click Add app to add apps you want to add.

-
Then, in the field code field, set the fields of the app from which to retrieve information.
Up to 10 fields can be set.
Some values cannot be retrieved, depending on the field types. For details on fields that you cannot retrieve information from, refer to Limitations.
When you click to add field code, the add field code screen appears.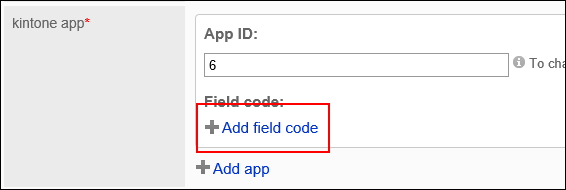 On the screen to add field code, select the field code for the field of the app to retrieve information from, then click Add.
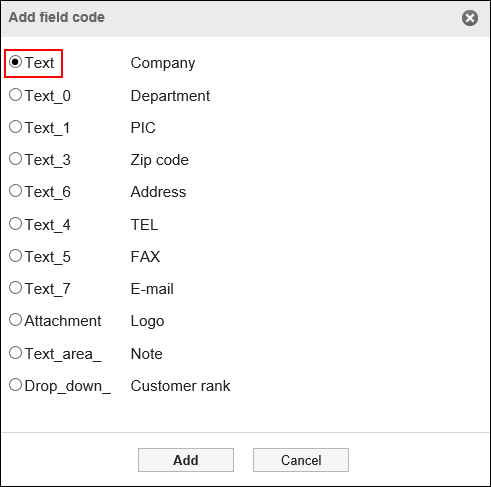
-
Confirm your settings and click Add.
Editing Related Items
Change the settings for related items.
-
Click the Administration menu icon (gear icon) in the header.
The gear-shaped icon appears only on the screen for the users with administrative privileges. -
Click Garoon System Administration.
-
Select "Application settings" tab.
-
Click Scheduler.
-
Click kintone connector.
-
On the "kintone connector" screen, click the item name of the item you want to change.
-
On the "Edit related item" screen, you can change the settings for the required items.
To change the app that information is retrieved from, delete all field codes before changing the app ID.
You cannot change the display order of the kintone apps. kintone apps will be displayed in the order they were added.
Example of "Edit related item" screen: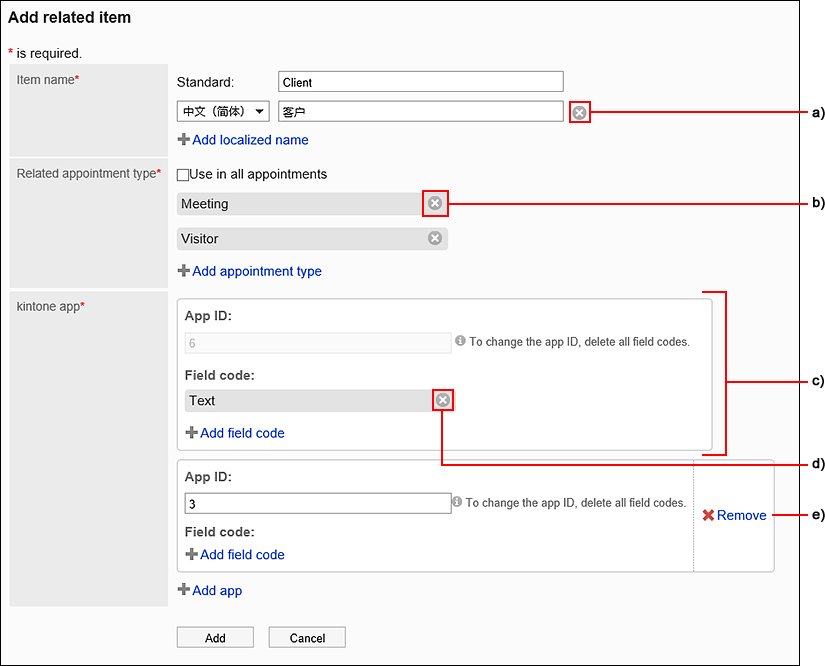 a): Delete an item name.b): Delete the contents in "Related appointment type" field.c): You must add one or more of the apps and fields from which to retrieve information.d): Delete fields set as information sources. If you delete fields, the information retrieved from the kintone app does not appear on Scheduler screens.
If you add the deleted fields again, the information retrieved from the kintone app will be displayed again on Scheduler screens.e): Delete the app set as an information source. Once you delete the app, the information you have retrieved will no longer appear on the screen for the appointments that you acquired information on from the app.
If you add the deleted app and its fields again, the information retrieved from the kintone app will be displayed again on Scheduler screens. -
Confirm your settings and click Save.
Reordering Related Items
Reorder fields displayed in appointments.
-
Click the Administration menu icon (gear icon) in the header.
The gear-shaped icon appears only on the screen for the users with administrative privileges. -
Click Garoon System Administration.
-
Select "Application settings" tab.
-
Click Scheduler.
-
Click kintone connector.
-
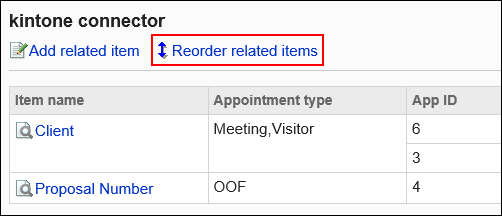
Click Reorder related items on the "kintone connector" screen.
-
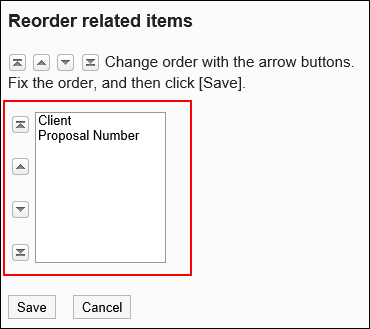
On the reorder related items screen, reorder the related items.
-
Confirm your settings and click Save.
Removing Related Items
Remove items related to kintone apps.
Once related items are removed, all information retrieved will no longer appear on the appointment screen.
-
Click the Administration menu icon (gear icon) in the header.
The gear-shaped icon appears only on the screen for the users with administrative privileges. -
Click Garoon System Administration.
-
Select "Application settings" tab.
-
Click Scheduler.
-
Click kintone connector.
-
On the "kintone connector" screen, click
 for the related items to delete.
-
Click Yes in the confirmation screen.