Setting Default Shared with Users
You can set default values for "Shared with" users.
By configuring users (such as members and managers of your division) as the default "Shared with" users, you can quickly and easily select the users to share your appointments.
If the system administrator has set the default "Shared with" of your appointments, then you can change the "Shared with" as you like.
Adding Default "Shared with"
You can set the default "Shared with" users.
-
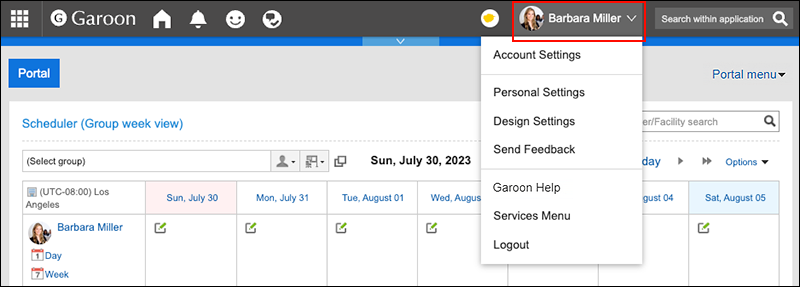
Click User name in the header.
-
Click Personal Settings.
-
Click Setting of each application.
-
Click Scheduler.
-
Click Default "Shared with".
-
On the "Default Shared with list" screen, click Add.
-
On "Add defaults" screen, select the user, organization, or role to set as the default "Shared with", and then click Add.
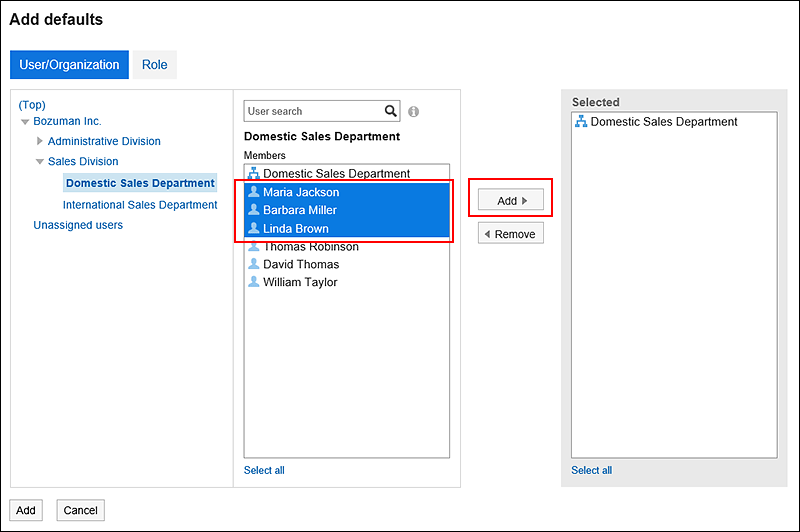 You can search users using keywords.
Depending on your system administrator settings, you may not be able to select organizations or roles as "Shared with".
For details, refer to Allowing Users to Specify Organizations/Roles for "Shared with" Users. -
Check the selections and click Add.
Reordering Default "Shared with"
You can reorder the default "Shared with" users.
-
Click User name in the header.

-
Click Personal Settings.
-
Click Setting of each application.
-
Click Scheduler.
-
Click Default "Shared with".
-
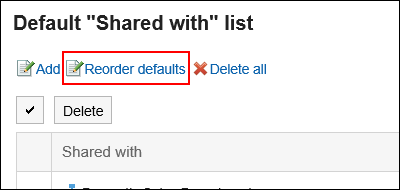
On the "Default Shared with list" screen, click "Reorder defaults".
-
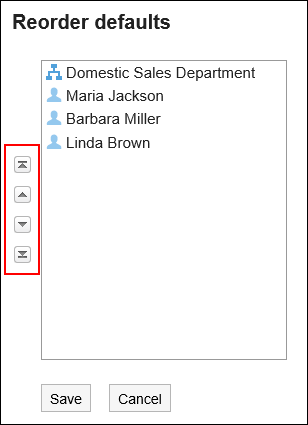
On "Reorder defaults" screen, reorder users, departments, or roles.
-
Confirm your settings and click Save.
Deleting Default "Shared with"
You can delete the default "Shared with" users.
Selecting Default "Shared with" to Delete
Select default "Shared with" users to delete.
-
Click User name in the header.

-
Click Personal Settings.
-
Click Setting of each application.
-
Click Scheduler.
-
Click Default "Shared with".
-
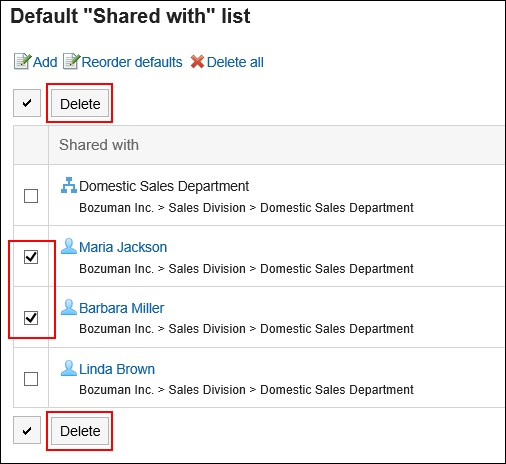
On the "Default Shared with list" screen, select the checkboxes of default "Shared with" users, and then click Delete.
-
Click Yes on "Delete defaults" screen.
Deleting All Default "Shared with"
Delete all default "Shared with" users.
-
Click User name in the header.

-
Click Personal Settings.
-
Click Setting of each application.
-
Click Scheduler.
-
Click Default "Shared with".
-
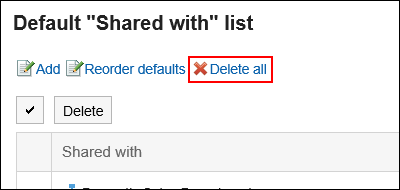
On the "Default Shared with list" screen, click Delete all.
-
Click Yes on "Delete all defaults" screen.