Posting Topics
You can select a category and write the contents to the topic.
-
Click the app icon
in the header.
-
Click Bulletin Board.
-
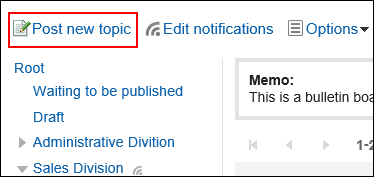
On the "Bulletin Board" screen, select a category and click Post new topic.
-
On the "Post new topic" screen, set the field of the creator.
The creator field is set as the login user.
To display the organization name, select the checkbox to show organization name, and then select the target organization from the dropdown list.
The organization name is displayed before the user name. Only one organization can be selected to be displayed. You can enter any name for the creator, if the system administrator has allowed users to manually enter it.
"Show membership" and "Manually enter" cannot be used at the same time.
-
Enter the "Subject" field.
This is a required field.
-
If necessary, set the field for the posting period.
To specify the period for which you want to publish the topic, select "Limit public period" and set the start and end date/time.
The topics before the publication are saved as the category of topics waiting to be published. They will be published on the start date and time in the specified category.
-
In the Body field, enter the topic content.
You can use Rich Text Formatting. For details, refer to Working with Rich Text Formatting.
-
If necessary, attach files to the "Attachments" field.
For details, refer to Attaching Files. -
Set the "Acknowledgment" field.
To know when the target users viewed the topics, select the "Request recipient's acknowledgment" checkbox.
This setting cannot be changed after you have posted the topic.
For details, refer to Acknowledgment Status.
-
Set the "Comments" field.
To allow users to write comments, select the checkbox to allow comments.
-
In the "Users who can edit/delete" field, select whether to allow users other than the creator to change or delete the topics.
To allow users other than the sender to do so, select "Select additional users" and select users you want to allow.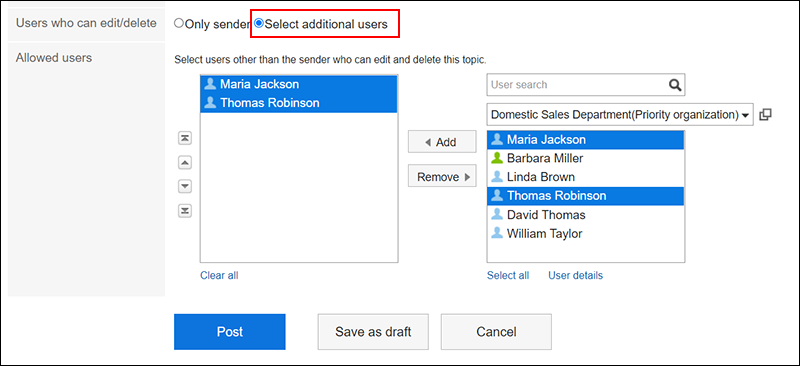
-
Confirm your settings and click Post.
| Item | Description |
|---|---|
| From |
|
| Posting period | If you want to specify the period for which you want to publish the topic, set the start and end date/time. The topics before the publication are saved as the category of topics waiting to be published. They will be published on the start date and time in the specified category. |
| Attachments | You can attach files to the topic. |
| Acknowledgment status | Set this option to know when the notification recipients have viewed the topic. This setting cannot be changed after you have posted the topic. |
| Post comments | Set to allow users to write comments. |
| Users who can edit/delete | You can use this to specify whether to allow users other than the sender to edit or delete topics. To allow users other than the sender to do so, select "Select additional users" and select users you want to allow. |
Reusing and Posting Topics
You can duplicate an existing topic and create a new one using it.
If you want to add a similar topic, you can save time.
However, the comments are not replicated.
-
Click the app icon
in the header.
-
Click Bulletin Board.
-
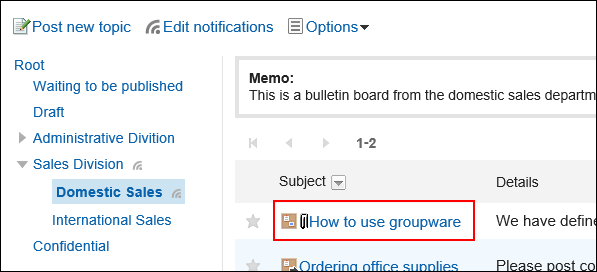
In the "Bulletin Board" screen, select the category and click the title of the topic to reuse.
-
Click the item for reuse on the topic details screen.

-
On the screen to reuse and post topics, set the topic contents as necessary.
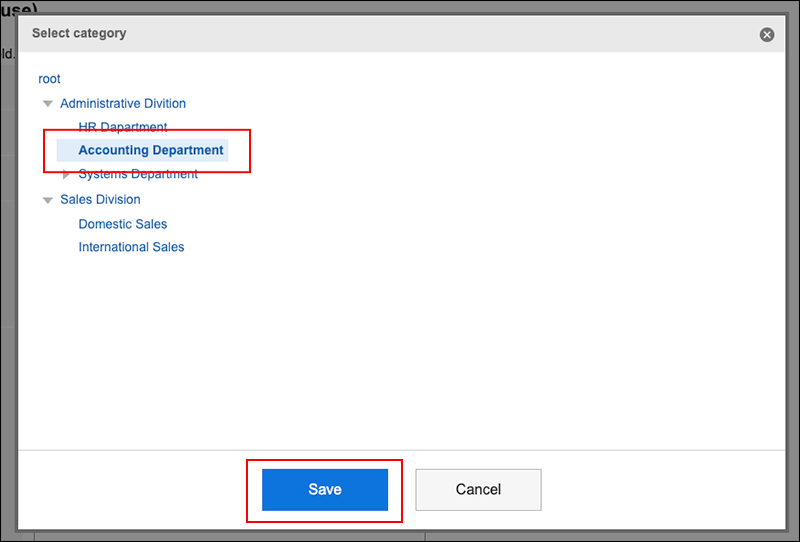
If you want to change the category of the topic, click Change in the "Category" section.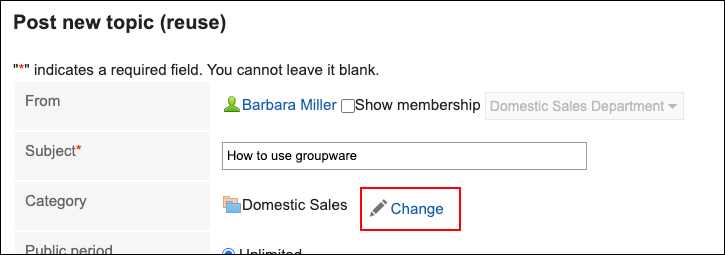 In the "Select a category" dialog, select a desired category and click Save.
-
Confirm your settings and click Post.
Saving Topics as Drafts
You can save the topic as a draft.
Only users who have saved the draft topic can view and edit it.
-
Click the app icon
in the header.
-
Click Bulletin Board.
-
On the "Bulletin Board" screen, select a category and click Post new topic.

-
On the screen to post topics, set the fields as necessary.
-
Confirm your settings and save it as draft.
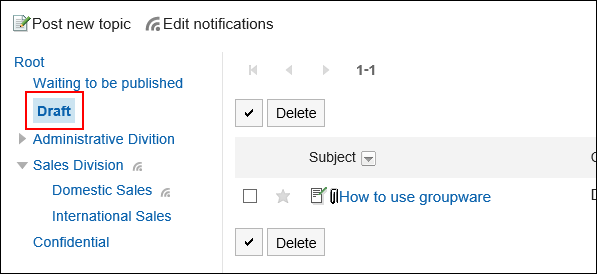
The draft post is saved in the draft category.
You can edit them later again and add them as a topic.