Configuring Web Mails
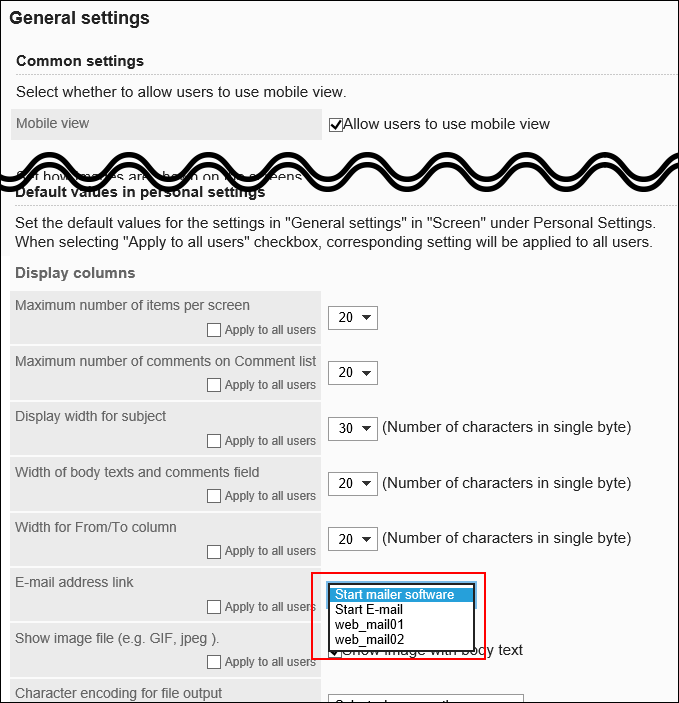
You can configure which Web mail to use when links to e-mail addresses are clicked that are included in the body text and comments.
The Web mail that has been set is displayed in the dropdown list to show linked applications for e-mail addresses on the "General settings" screen.
For details, refer to Default values in personal settings.
Adding Web Mails
You can add any Web mails linked from the e-mail addresses on the screen.
-
Click the Administration menu icon (gear icon) in the header.
The gear-shaped icon appears only on the screen for the users with administrative privileges. -
Click Garoon System Administration.
-
Select "Basic system administration" tab.
-
Click Screen.
-
Click Web mail accounts.
-
On the "Web mail accounts" screen, click Add web mail account.

-
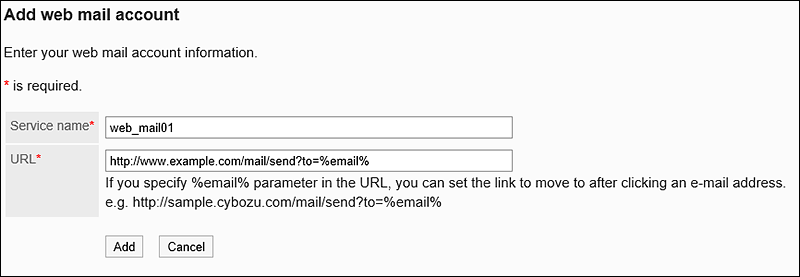
In the Web mail name field on the Add Web mail screen, enter the WEB mail name and URL.
- Web mail name:
You must set the Web mail name. - URL:
The URL is mandatory.
To set the source e-mail address, you must specify a parameter (% e-mail%) in the URL.
For the actual URL to configure, please contact the provider of each Web mail service.
- Web mail name:
-
Confirm your settings and click Add.
Changing Web Mails
You can change the display name and URL of the Web mail.
-
Click the Administration menu icon (gear icon) in the header.
The gear-shaped icon appears only on the screen for the users with administrative privileges. -
Click Garoon System Administration.
-
Select "Basic system administration" tab.
-
Click Screen.
-
Click Web mail accounts.
-
On the Web Mail screen, select the Web mail name to change.
-
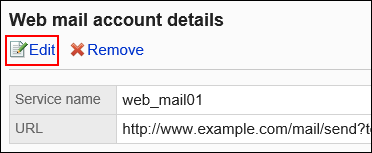
On the Web Mail Details screen, click Edit.
-
On the Edit Web Mail screen, change the Web mail name and URL if necessary.
-
Confirm your settings and click Save.
Deleting Web Mails
You can delete the Web mails.
Deleting Web Mails One by One
You can delete Web mails one by one.
-
Click the Administration menu icon (gear icon) in the header.
The gear-shaped icon appears only on the screen for the users with administrative privileges. -
Click Garoon System Administration.
-
Select "Basic system administration" tab.
-
Click Screen.
-
Click Web mail accounts.
-
On the Web Mail screen, select the Web mail name to delete.
-
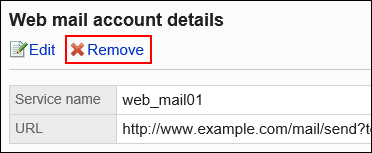
On the Web Mail Details screen, click Delete.
-
Click Yes on the Delete Web Mail screen.
Deleting Multiple Web Mails in Bulk
You can select multiple Web mails and delete them together.
-
Click the Administration menu icon (gear icon) in the header.
The gear-shaped icon appears only on the screen for the users with administrative privileges. -
Click Garoon System Administration.
-
Select "Basic system administration" tab.
-
Click Screen.
-
Click Web mail accounts.
-
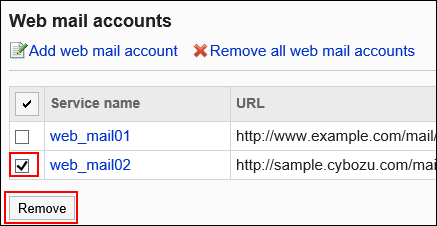
On the Web mail screen, select the checkbox for the Web mail to delete, and then click Delete.
-
Click Yes on the Delete All Web mails screen.
Deleting All Web Mails
You can delete all the Web mails.
-
Click the Administration menu icon (gear icon) in the header.
The gear-shaped icon appears only on the screen for the users with administrative privileges. -
Click Garoon System Administration.
-
Select "Basic system administration" tab.
-
Click Screen.
-
Click Web mail accounts.
-
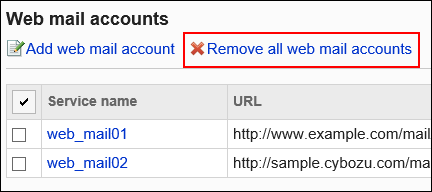
On the Web mail screen, click the item to delete all Web mails.
-
Click Yes on the Delete All Web Mail screen.