Deploying Portlets
Place portlets in portals.
Changing Portal Layouts
-
Click the Administration menu icon (gear icon) in the header.
The gear-shaped icon appears only on the screen for the users with administrative privileges. -
Click Garoon System Administration.
-
Select "Application settings" tab.
-
Click Portal.
-
Click Portals.
-
On the screen for a portal list, click the portal name for the portal to change its layout.
-
On the "Portal settings" screen, select the desired layout from the "Layout" dropdown list, and click Apply.
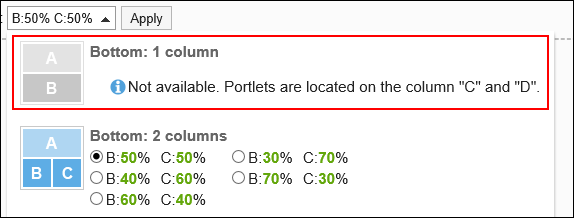
Select the column numbers and the ratio of the widths to place in lower half.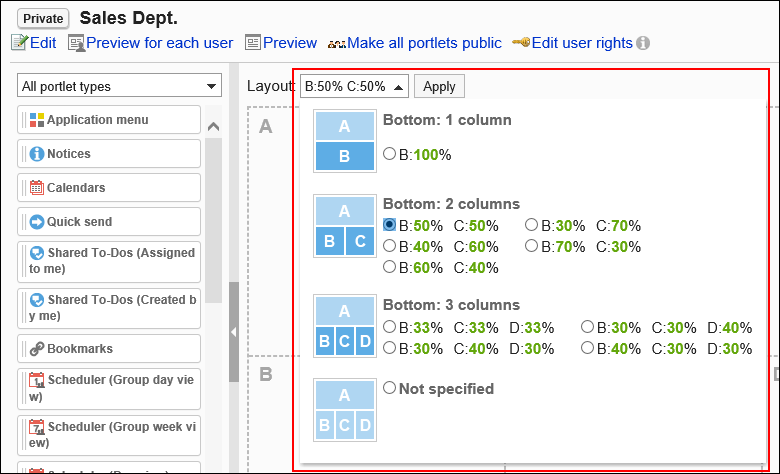 If the lower "C" or "D" already has portlets, you cannot select the bottom: 1 column layout.
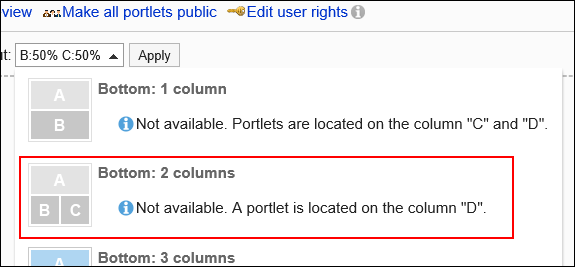
 If you have a portlet placed in the lower half, you cannot select a layout with fewer columns than the number of columns that the portlet has.
Adding Portlets
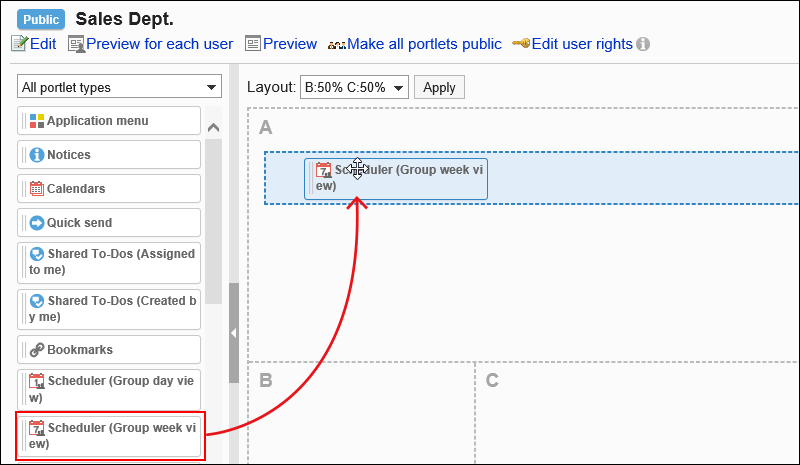
Add portlets to portals. You can do so by dragging and dropping portlets.
The guideline for the maximum number of portlets placed to one portal is 20. Placing portlets that put excessive loads on the server or a large number of portlets on portals may cause a heavy load on Garoon.
-
Click the Administration menu icon (gear icon) in the header.
The gear-shaped icon appears only on the screen for the users with administrative privileges. -
Click Garoon System Administration.
-
Select "Application settings" tab.
-
Click Portal.
-
Click Portals.
-
On the "Portals" screen, select a portal.
-
On the "Portal settings" screen, select the portlet to add and drag it to the desired destination.
 You can filter the portlets to display on the list.
To filter portlets, click the filter name on the left and select the filter you want.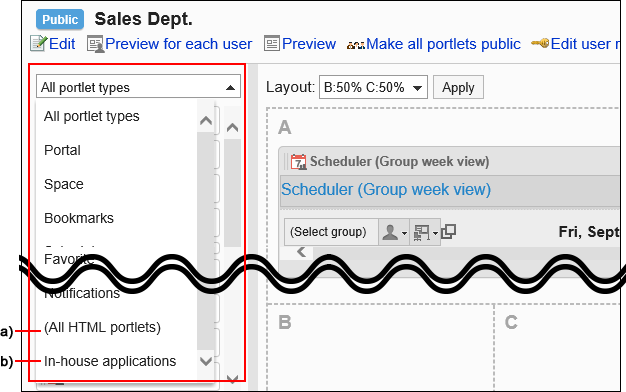 a): The filter appears when you set HTML portlets.B): The Portlet group name is displayed when you are setting it.
Moving Portlets
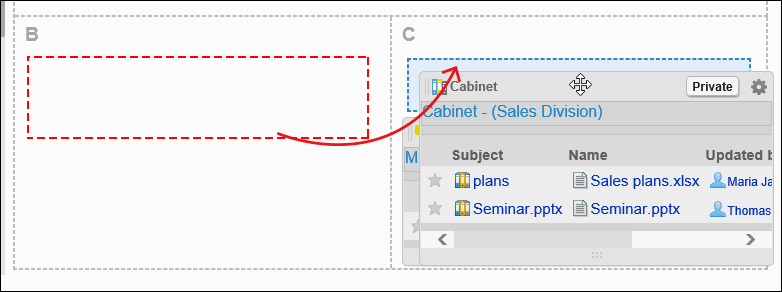
Move portlets to another column.
-
Click the Administration menu icon (gear icon) in the header.
The gear-shaped icon appears only on the screen for the users with administrative privileges. -
Click Garoon System Administration.
-
Select "Application settings" tab.
-
Click Portal.
-
Click Portals.
-
On the "Portals" screen, select a portal.
-
On the "Portal settings" screen, select the portlet to move and drag it to the desired destination.
Deleting Portlets Placed in Portals
Delete portlets that are placed.
-
Click the Administration menu icon (gear icon) in the header.
The gear-shaped icon appears only on the screen for the users with administrative privileges. -
Click Garoon System Administration.
-
Select "Application settings" tab.
-
Click Portal.
-
Click Portals.
-
On the "Portals" screen, select a portal.
-
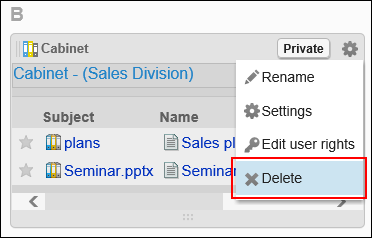
On the "Portal settings" screen, click Delete on the gear icon
 for the portlet to delete.
-
Click Yes on "Delete" screen.