Setting Categories
Set categories and manage spaces.
For example, if you create categories by project, you can organize spaces related to projects into categories.
Categories can be layered.
Only system administrators and space application administrators can create categories.
Adding Categories
Add categories.
-
Click the Administration menu icon (gear icon) in the header.
The gear-shaped icon appears only on the screen for the users with administrative privileges. -
Click Garoon System Administration.
-
Select "Application settings" tab.
-
Click Space.
-
Click "Setting categories".
-
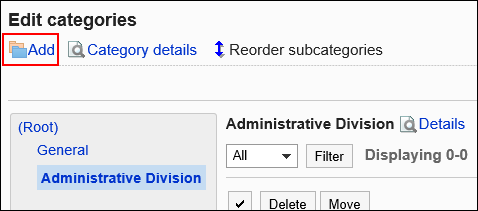
On "Setting categories" screen, select a parent category, and then click Add.
-
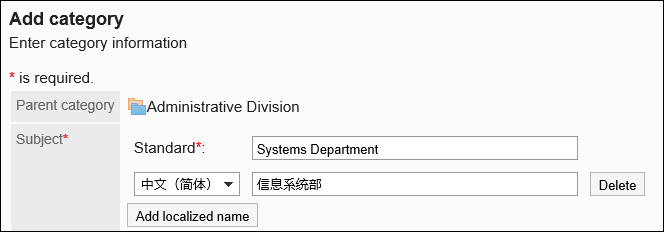
On the "Add Categories" screen, enter the "Subject" field.
This is a required field.
Clicking Add localized name allows you to set subjects in multiple languages.
If you do not set the subject in the user preference language, the default subject is displayed.
The following languages can be set:- 日本語
- English
- 中文(简体)
- 中文(繁體)
Displayed in Traditional Chinese.
-
Set the Category Code field.
You should set the category code.
This is a unique code for identifying categories.
-
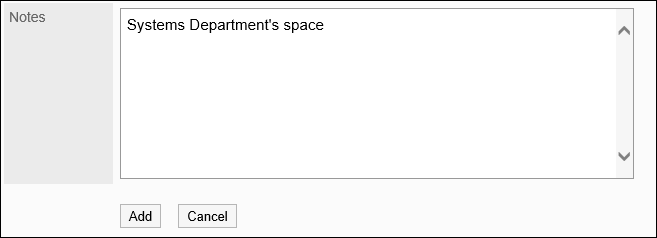
Set the Notes field as needed.
-
Confirm your settings and click Add.
Changing Categories
Change categories.
You cannot change "root".
-
Click the Administration menu icon (gear icon) in the header.
The gear-shaped icon appears only on the screen for the users with administrative privileges. -
Click Garoon System Administration.
-
Select "Application settings" tab.
-
Click Space.
-
Click "Setting categories".
-
On "Setting categories" screen, select the category to change, and then click the item for category details.
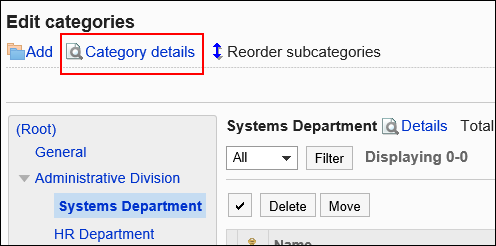 When you click "Details" to the right of the category name, the category details page is displayed.
 -
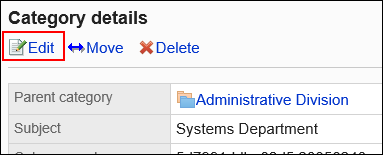
On the screen for category details, click Save.
-
On the screen to change categories, set the necessary items.
-
Confirm your settings and click Save.
Moving Categories
Move the subcategory to another category.
You cannot move "root".
-
Click the Administration menu icon (gear icon) in the header.
The gear-shaped icon appears only on the screen for the users with administrative privileges. -
Click Garoon System Administration.
-
Select "Application settings" tab.
-
Click Space.
-
Click "Setting categories".
-
On "Setting categories" screen, select the category to move, and then click the item for category details.
 When you click "Details" to the right of the category name, the category details page is displayed.
 -
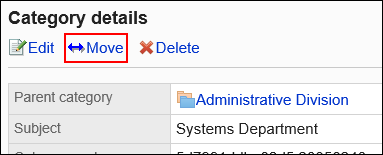
On the screen for category details, click "Move".
-
On the screen to move categories, select the destination category.
Clicking "Move up" moves the category up one level.
Clicking on a category name moves you to the parent category of the category you clicked.
You can search for categories to move categories into by entering keywords and clicking "Category search".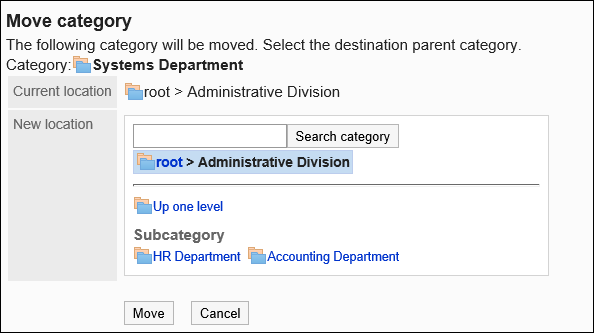
-
Confirm your settings and click Move.
Reordering Subcategories
Reorder subcategories in a category.
-
Click the Administration menu icon (gear icon) in the header.
The gear-shaped icon appears only on the screen for the users with administrative privileges. -
Click Garoon System Administration.
-
Select "Application settings" tab.
-
Click Space.
-
Click "Setting categories".
-
On "Setting categories" screen, select a category to reorder its subcategories, and then click Reorder subcategories.

-
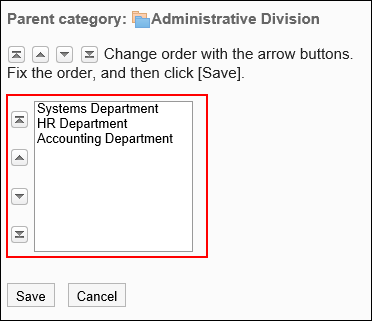
On the screen to reorder subcategories, reorder subcategories.
-
Confirm your settings and click Save.
Deleting Categories
Delete empty categories.
You cannot delete categories that include spaces or subcategories and "root".
-
Click the Administration menu icon (gear icon) in the header.
The gear-shaped icon appears only on the screen for the users with administrative privileges. -
Click Garoon System Administration.
-
Select "Application settings" tab.
-
Click Space.
-
Click "Setting categories".
-
On "Setting categories" screen, select the category to delete, and then click the item for category details.
 When you click "Details" to the right of the category name, the category details page is displayed.
 -
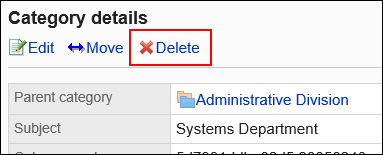
On the screen for category details, click Delete.
-
Click Yes on the page to delete categories.