Deleting Only a Single App When There Are Reference Relationships Among Multiple Apps
If reference relationships exist among apps as a result of Lookup field/Related Records field settings, you cannot delete the app independently.
To delete an app independently, you need to remove its reference relationship with other apps.
You can remove reference relationships in either of the following ways.
Note that, deleting an app requires the management permission for the app.
- Auto-detect the app's reference relationships using the deletion dialog, then remove the references
When you try to delete an app, apps and fields that have reference relationship with that app are automatically detected. Move to the app settings screen from the detection results screen, and remove the reference relationship. Then, try to delete the app again. - Manually remove the app's reference relationships, then delete the app
You can manually remove the reference relationship, and then delete the app.
We describe the steps to delete one of the apps included in the Sales CRM Pack in the above two ways.
Auto-detecting an app's reference relationships using the deletion dialog and removing the references
-
Open the app that you want to delete.
-
Click the App Settings icon (the gear-shaped icon) at the upper right of the "View" screen.

-
On the "App Settings" screen, click the App Settings tab, then click Delete This App under Deletion.
-
Click Delete This App on the confirmation screen.
-
If the confirmation screen appears again, click Delete App.
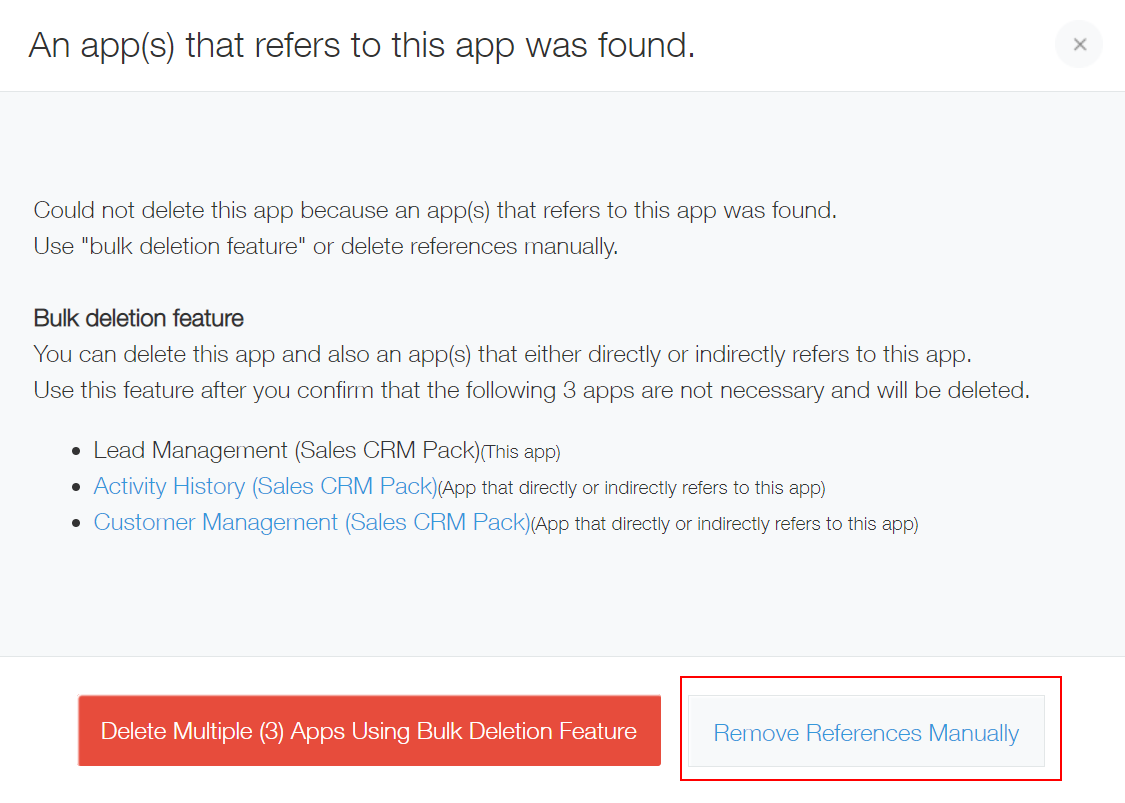
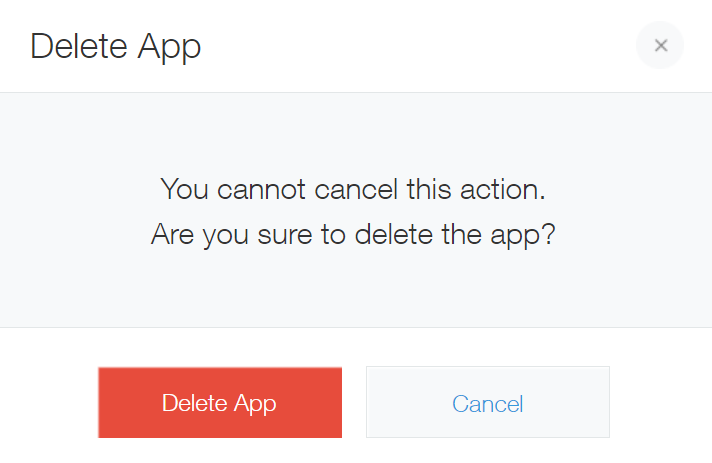 Apps that have reference relationship with the app to be deleted are automatically checked. If there is any app which has reference relationship, "An app(s) that refers to this app was found." screen is displayed.
 -
In the "An app(s) that refers to this app was found." screen, click Remove References Manually.
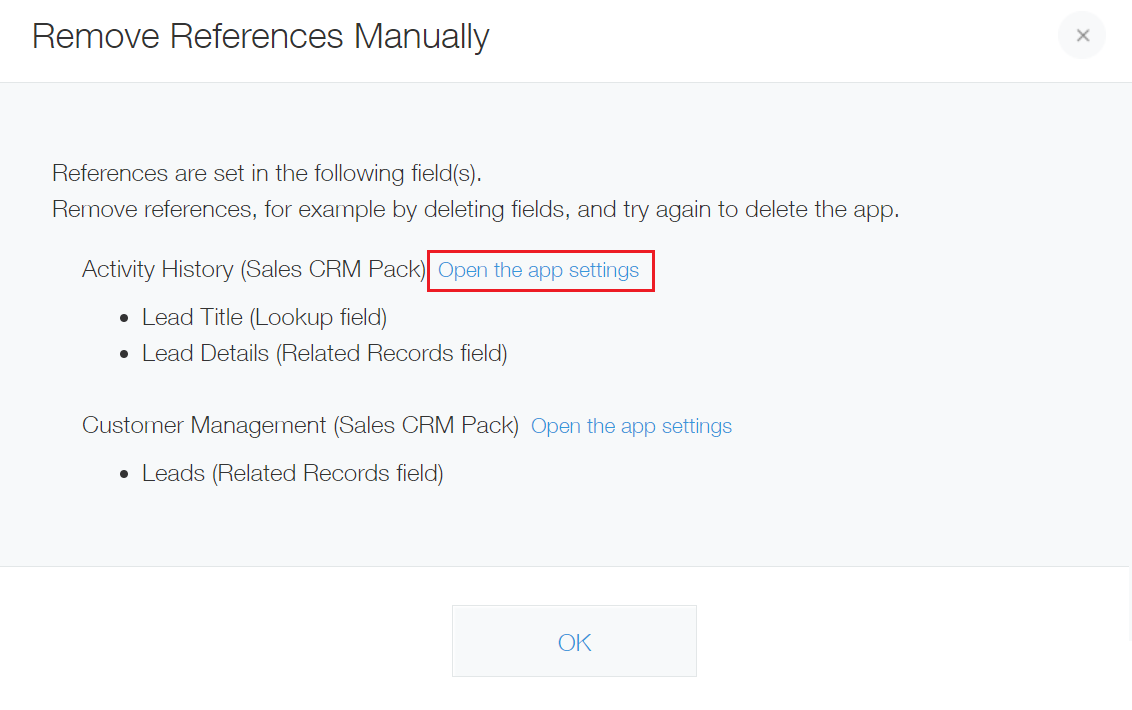
 The "Remove References Manually" screen is displayed, and apps and fields that directly refer the app to be deleted are shown.
 -
Click on the link displayed on the "Remove References Manually" screen to move to the app settings.
-
Delete the "Lookup" or "Related records" field that was displayed on the "Remove References Manually" screen. Then, update the app.
Example: In this example, delete the Lead Title (Lookup field) and the Lead Details (Related records field), which are shown in step 6.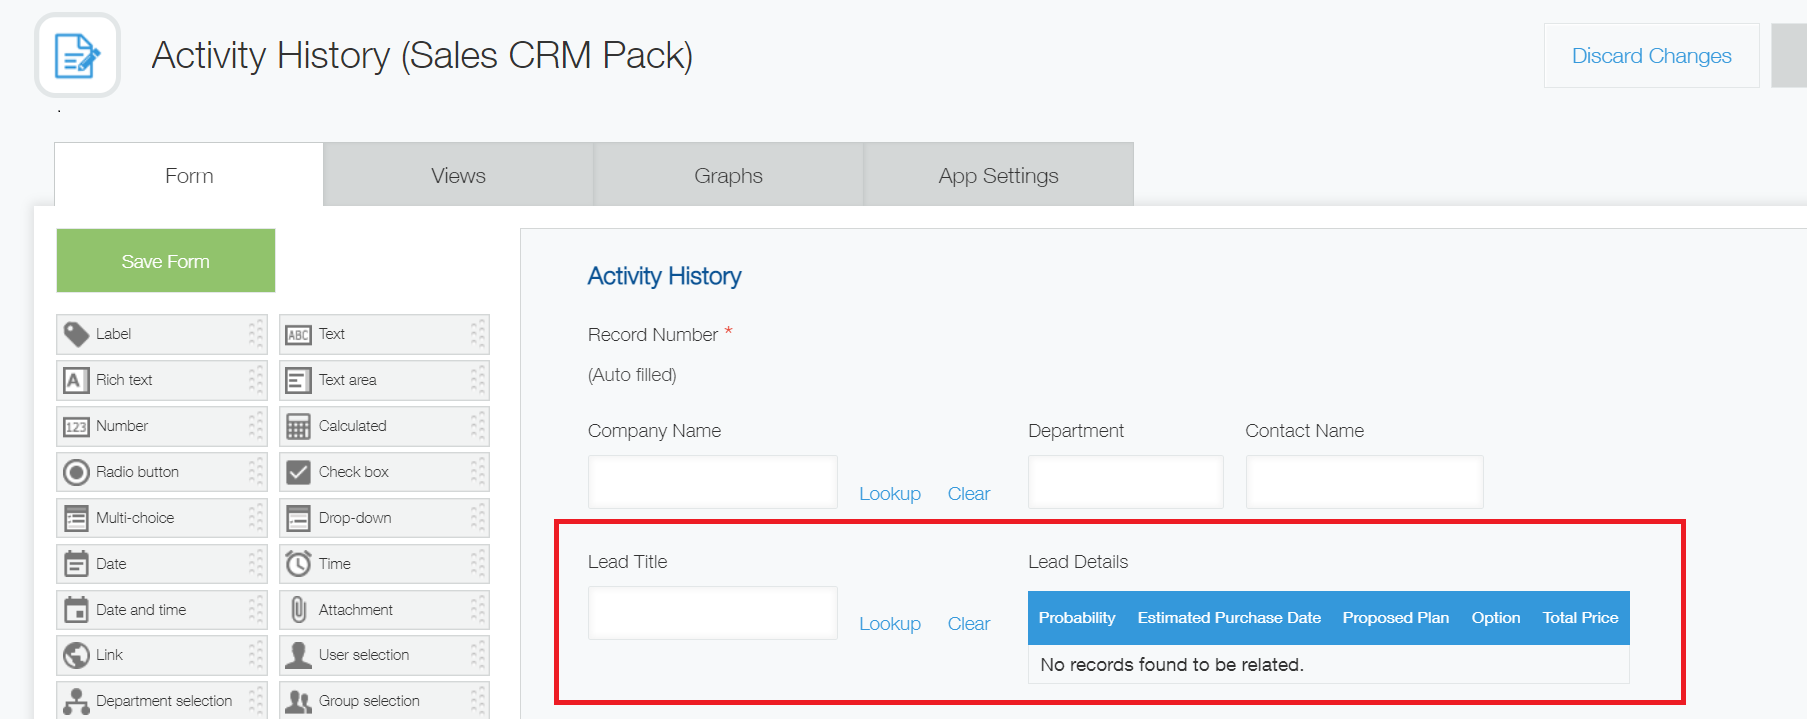
-
Repeat steps 6 and 7 to remove all references.
-
Reopen the app settings page for the app to be deleted, and click Delete This App in the "App Settings" tab to redo the app deletion.
Removing reference relationship manually and deleting an app
By deleting the following fields in apps, you can remove reference relationships among apps included in the Sales CRM Pack. Delete the target app after dissolving reference relationship.
- Activity History App
Delete the "Company Name", "Lead Title", and "Lead Details" fields.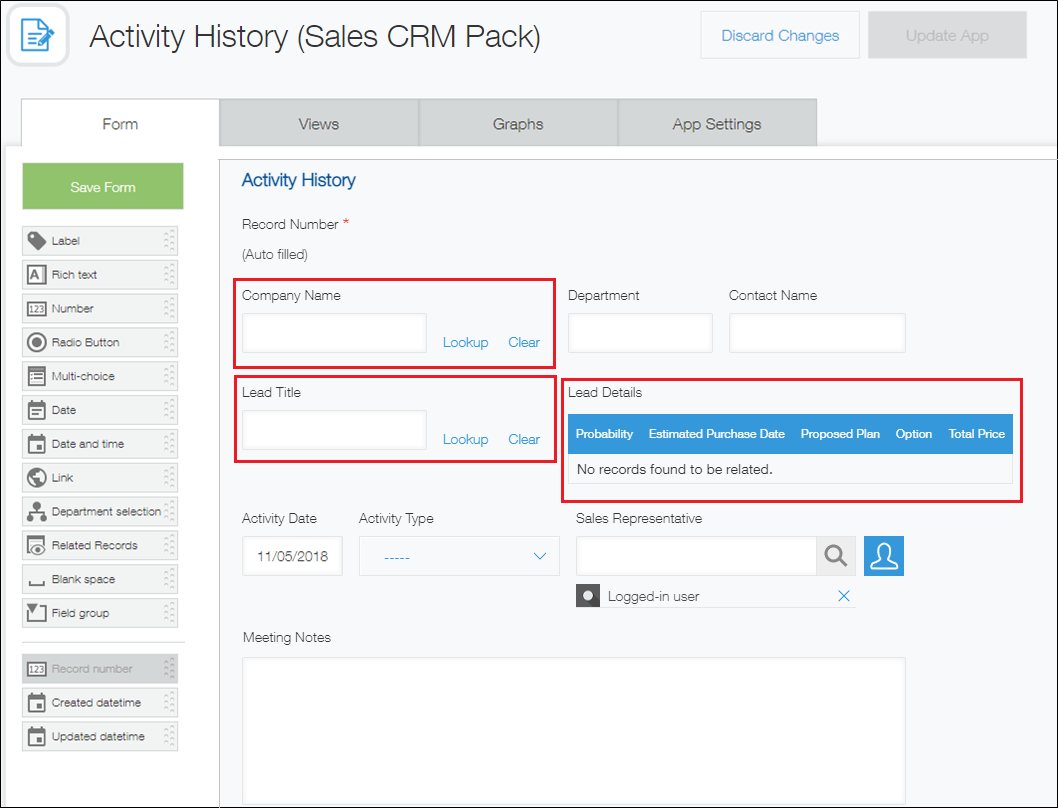
- Lead Management App
Delete the "Company Name" and "Related Activity History" fields.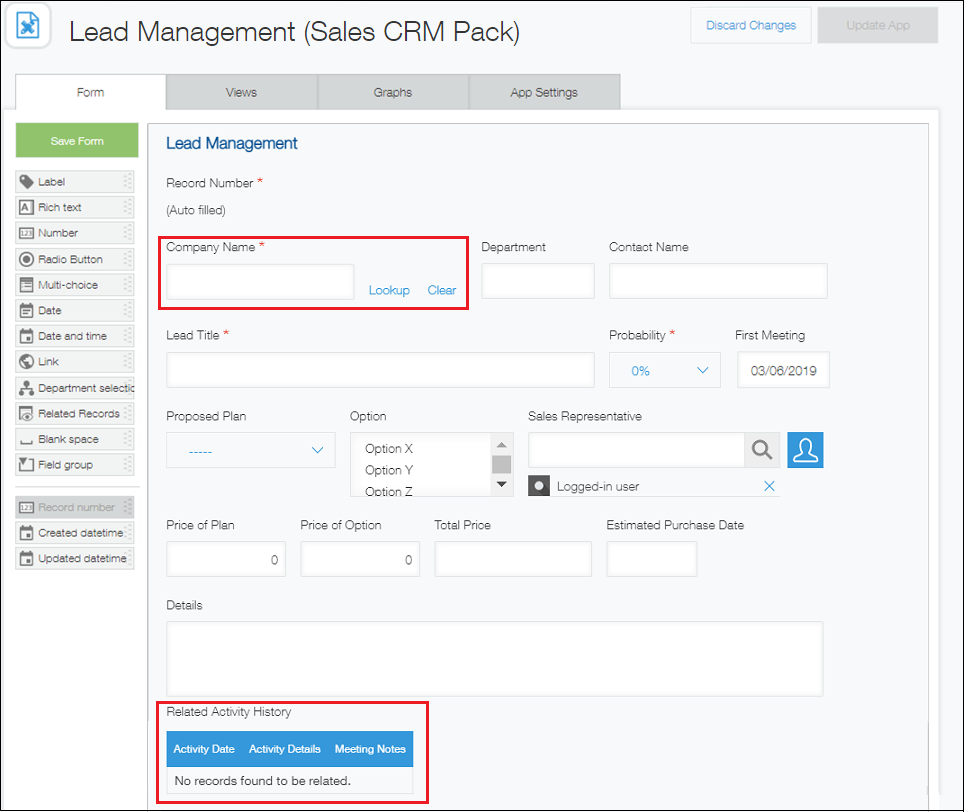
- Customer Management App
Delete the "Leads" and "Activity History" fields.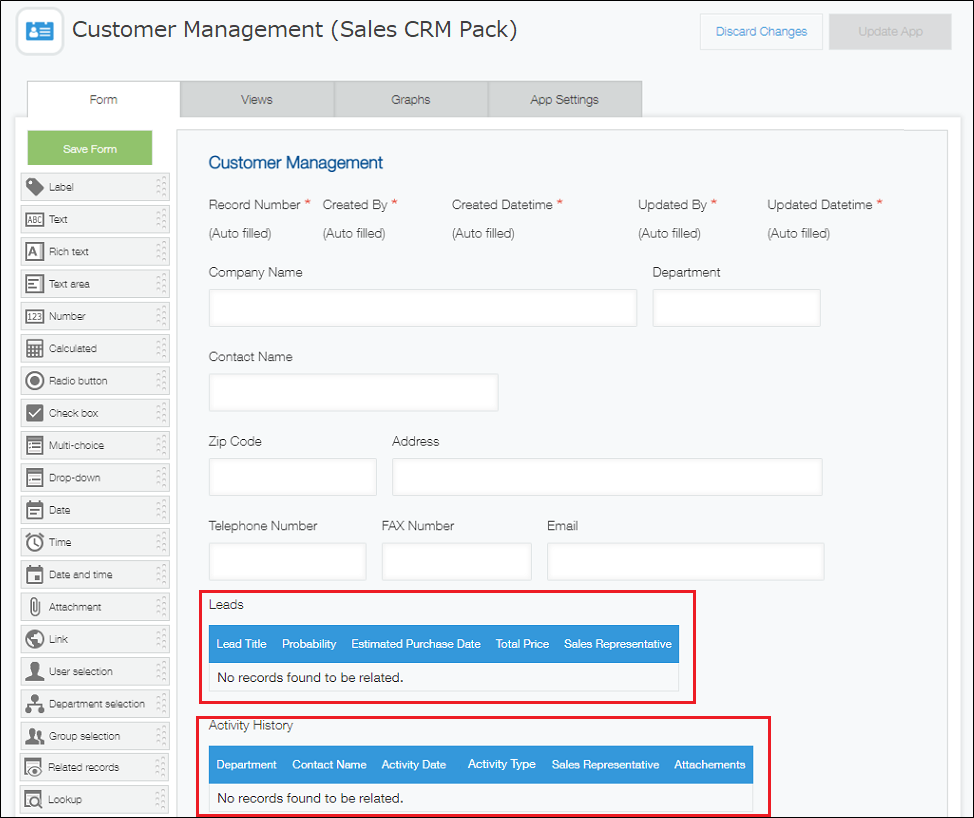
The following example shows how to delete the Customer Management app included in the Sales CRM Pack.
Step 1: In the Activity History app, delete the "Lookup" field and "Related records" fields
-
Open the Activity History app.
-
Click the App Settings icon (the gear-shaped icon) at the upper right of the "View" screen.

-
On the "App Settings" screen, click the Form tab.
-
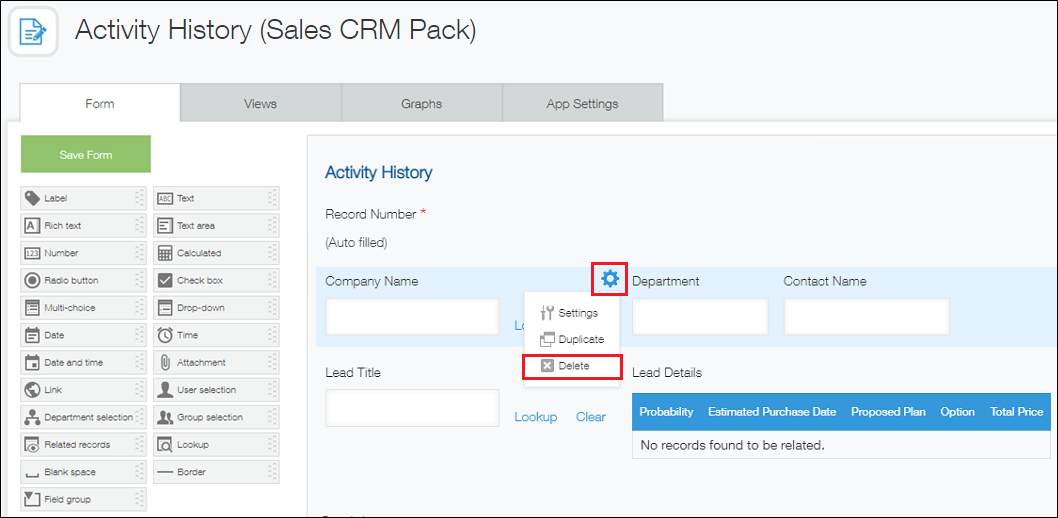
Hover your cursor over the Settings icon (the gear-shaped icon) at the upper right of the "Company Name" field (the "Lookup" field), then click Delete.
-
Click Delete on the confirmation screen.
-
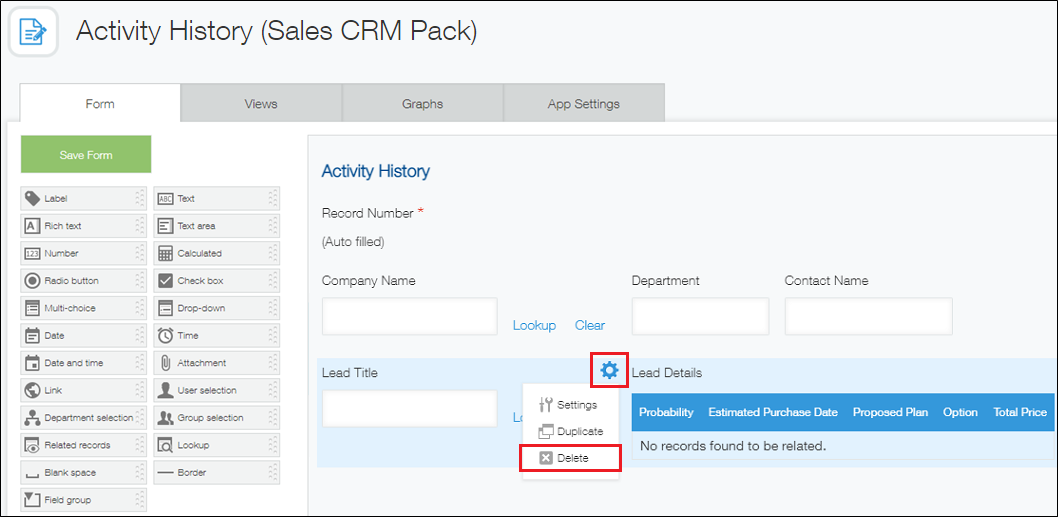
Hover the cursor over the Settings icon (the gear-shaped icon) at the upper right of the "Lead Title" field (the "Lookup" field), then click Delete. On the confirmation screen, click Delete.
-
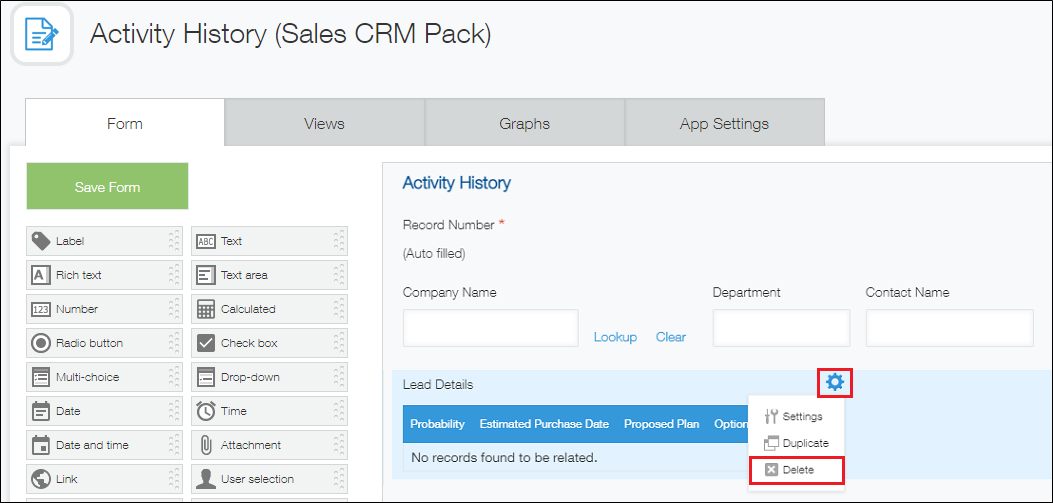
Hover the cursor over the Settings icon (the gear-shaped icon) at the upper right of the "Lead Details" field (the "Related records" field), then click Delete. On the confirmation screen, click Delete.
-
Click Update App at the upper right of the screen.
-
On the confirmation dialog, click Update App.
Step 2: In the Lead Management app, delete the "Lookup" field
-
Open the Lead Management app.
-
Click the App Settings icon (the gear-shaped icon) at the upper right of the "View" screen.

-
On the "App Settings" screen, click the Form tab.
-
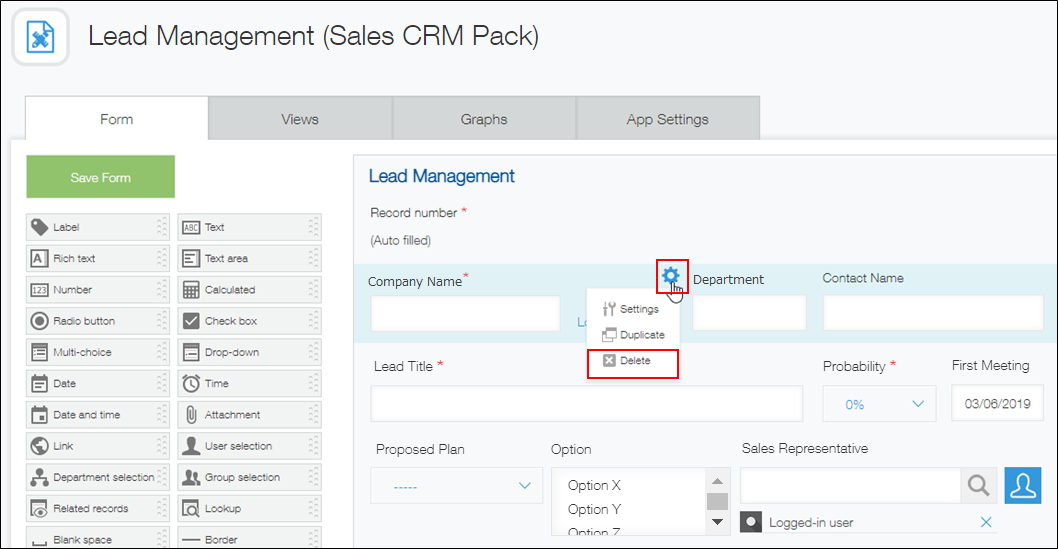
Hover your cursor over the Settings icon (the gear-shaped icon) at the upper right of the "Company Name" field (the "Lookup" field), then click Delete.
-
Click Delete on the confirmation screen.
-
Click Update App on the upper right side of the screen.
-
On the confirmation dialog, click Update App.
Step 3: Delete the Customer Management app
-
Open the app that you want to delete (in this example, the Customer Management app).
-
Click the App Settings icon (the gear-shaped icon) at the upper right of the "View" screen.

-
On the "App Settings" screen, click the App Settings tab, then click Delete This App under Deletion.
-
Click Delete This App on the confirmation screen.
