Changing the settings of an app
Apps in kintone allow you to flexibly adjust their settings to meet your users' changing needs, even after activation.
This article describes how to change the settings of an app.
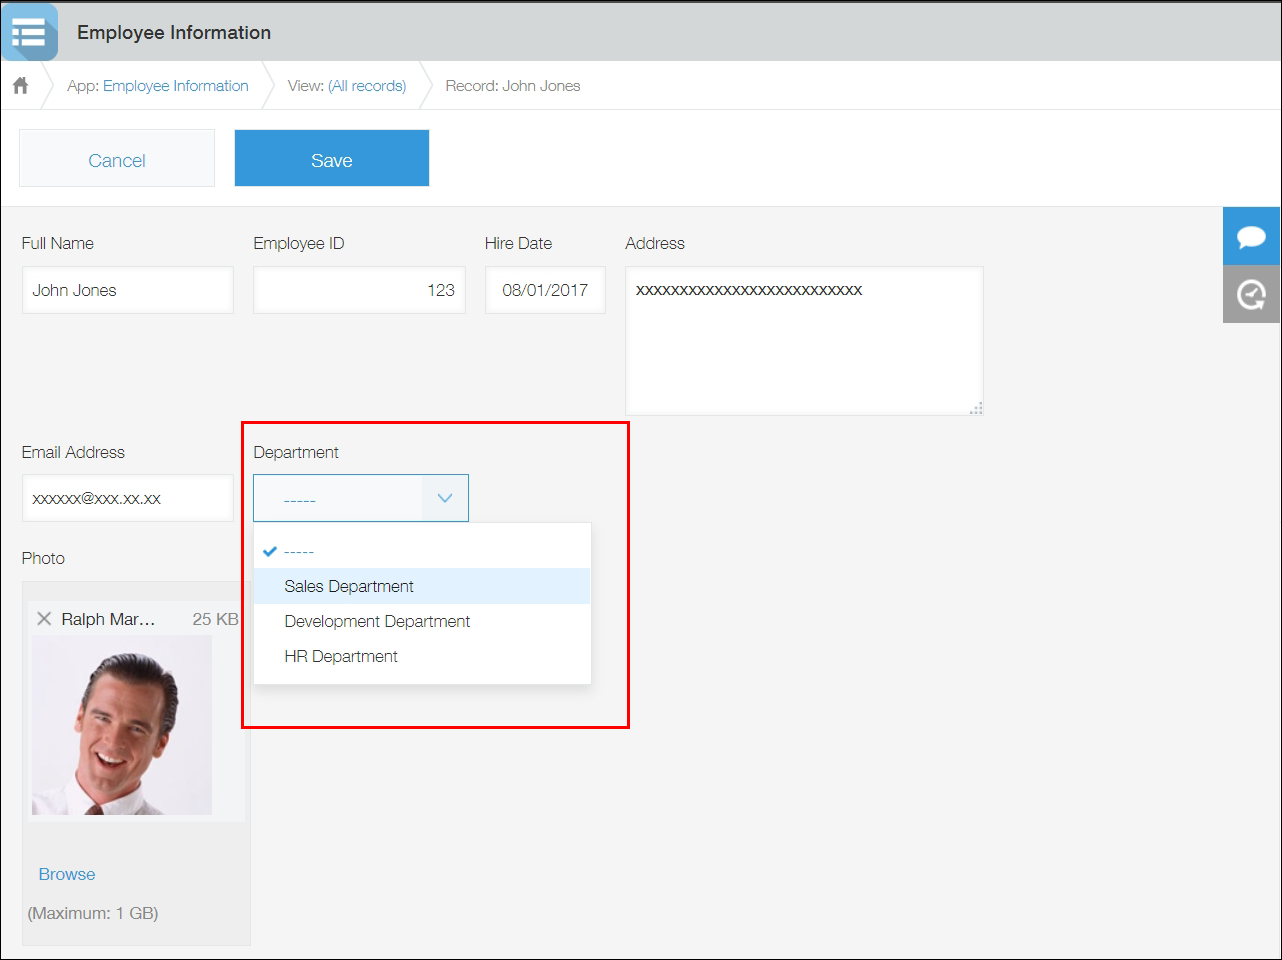
As an example, this article shows you how to add an input field "Department" in the "Employee Information" app you have created in Creating an App. Since you want app users to select a department from a drop-down list, you will place a "Drop-down" field on the app form.
The added "Department" input field will look like this:
-
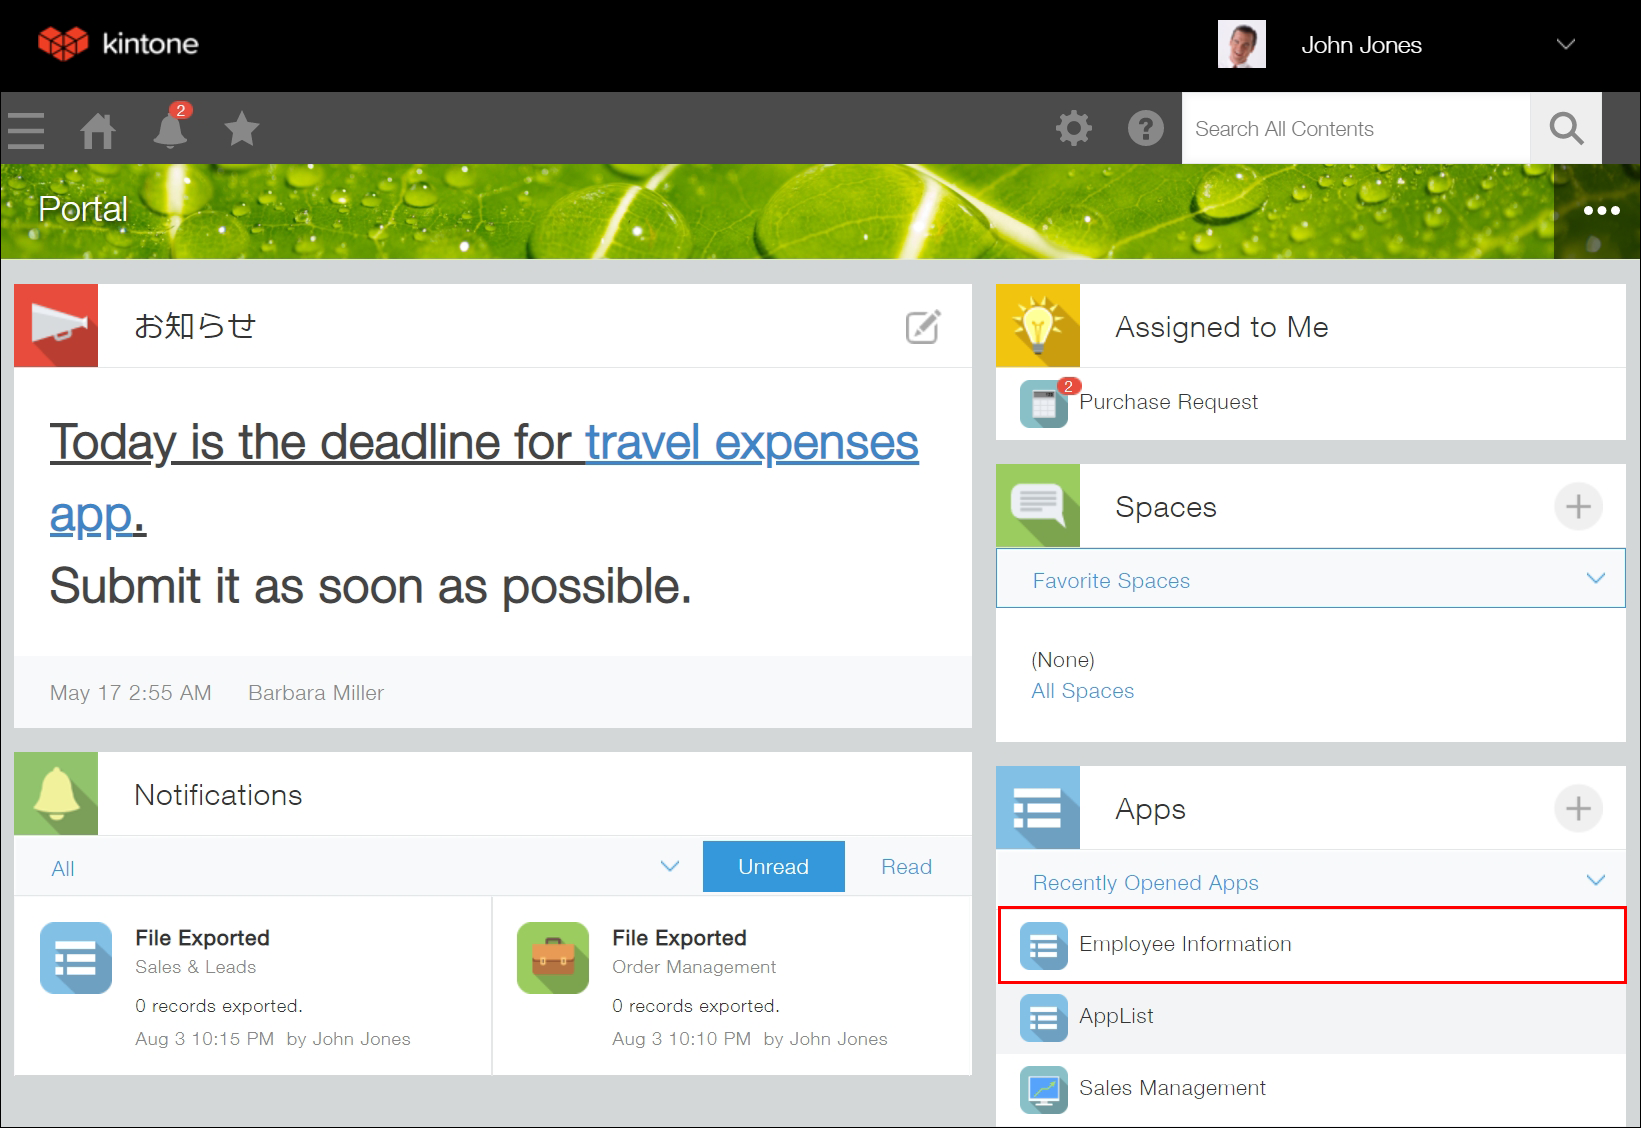
Navigate to the top page of kintone, and click on the "Employee Information" app in the Apps section.
-
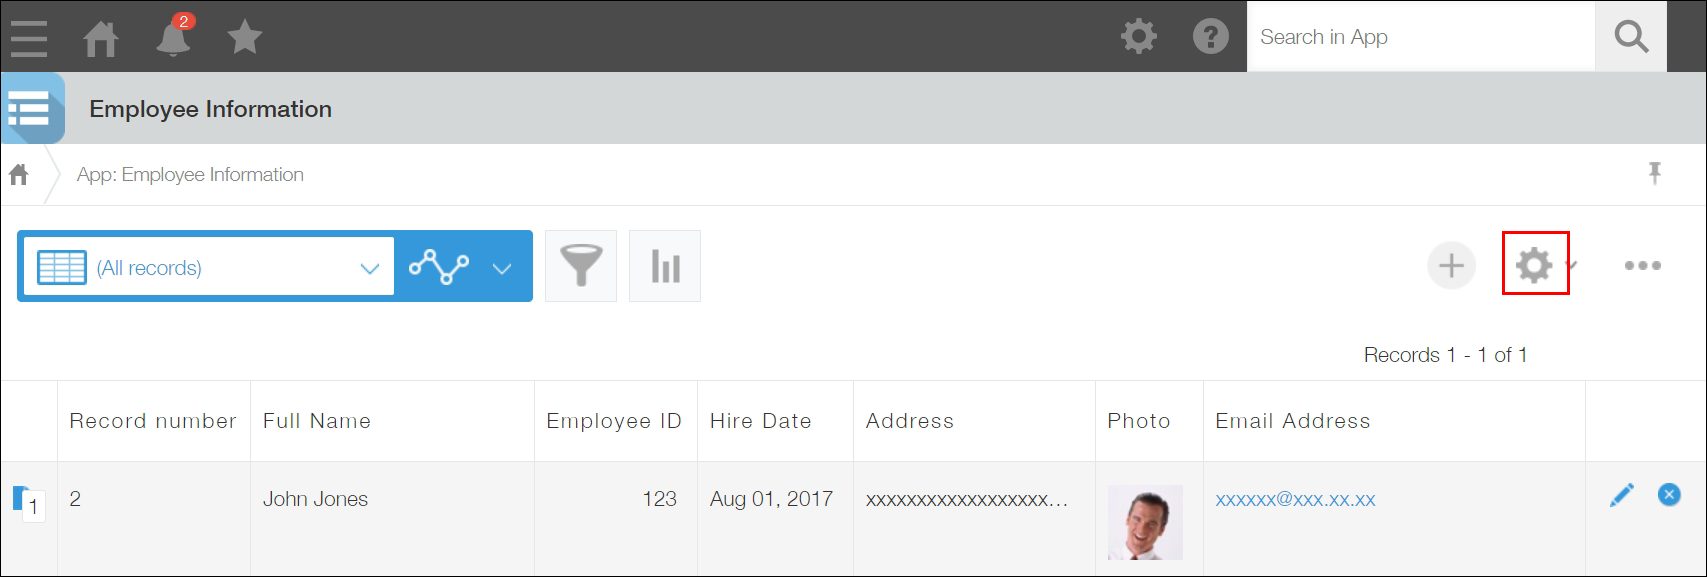
Click the App settings icon (the gear-shaped icon) at the upper right of the app's main page.
-
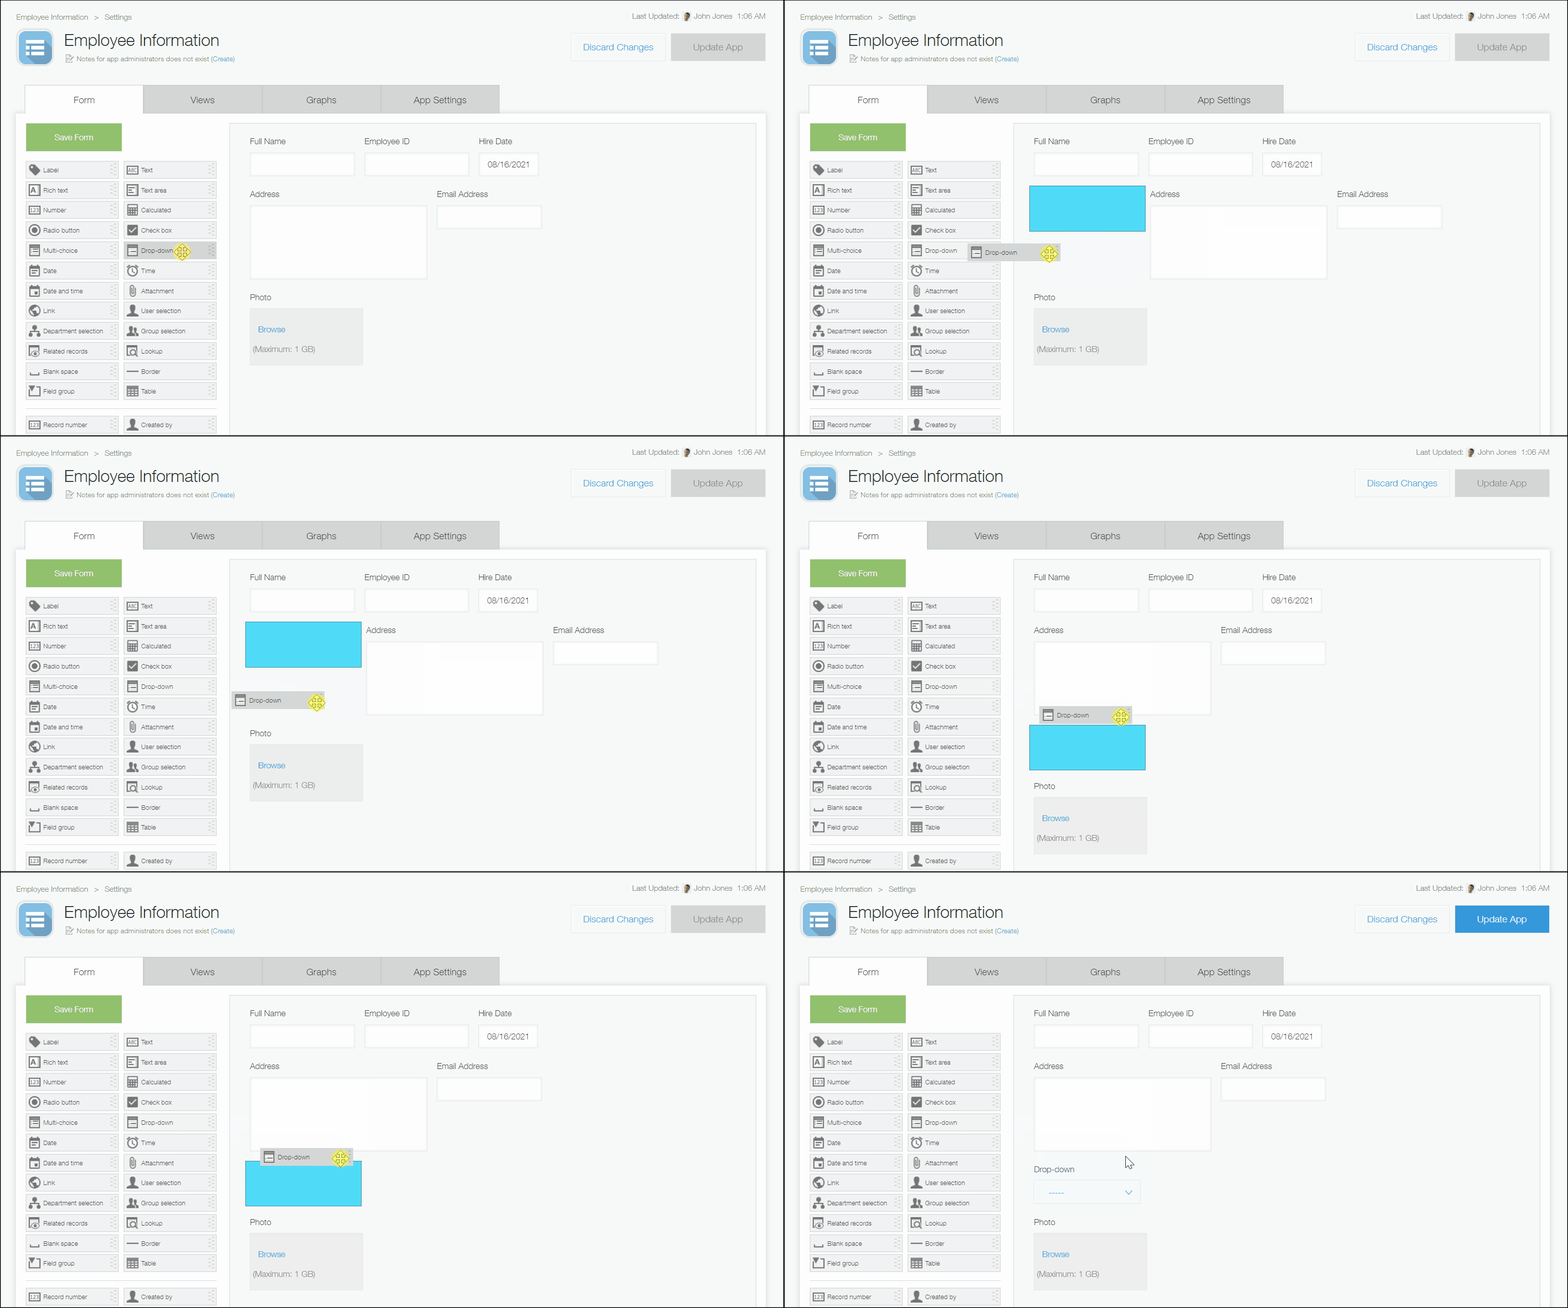
From the list of fields displayed on the left side of the screen, drag the Drop-down field and drop it onto the right area of the screen.
-
Hover the cursor over the top right of the Drop-down field that you placed in Step 3. When the Field Settings icon (the gear-shaped icon at the top right of the field) appears, click Settings.
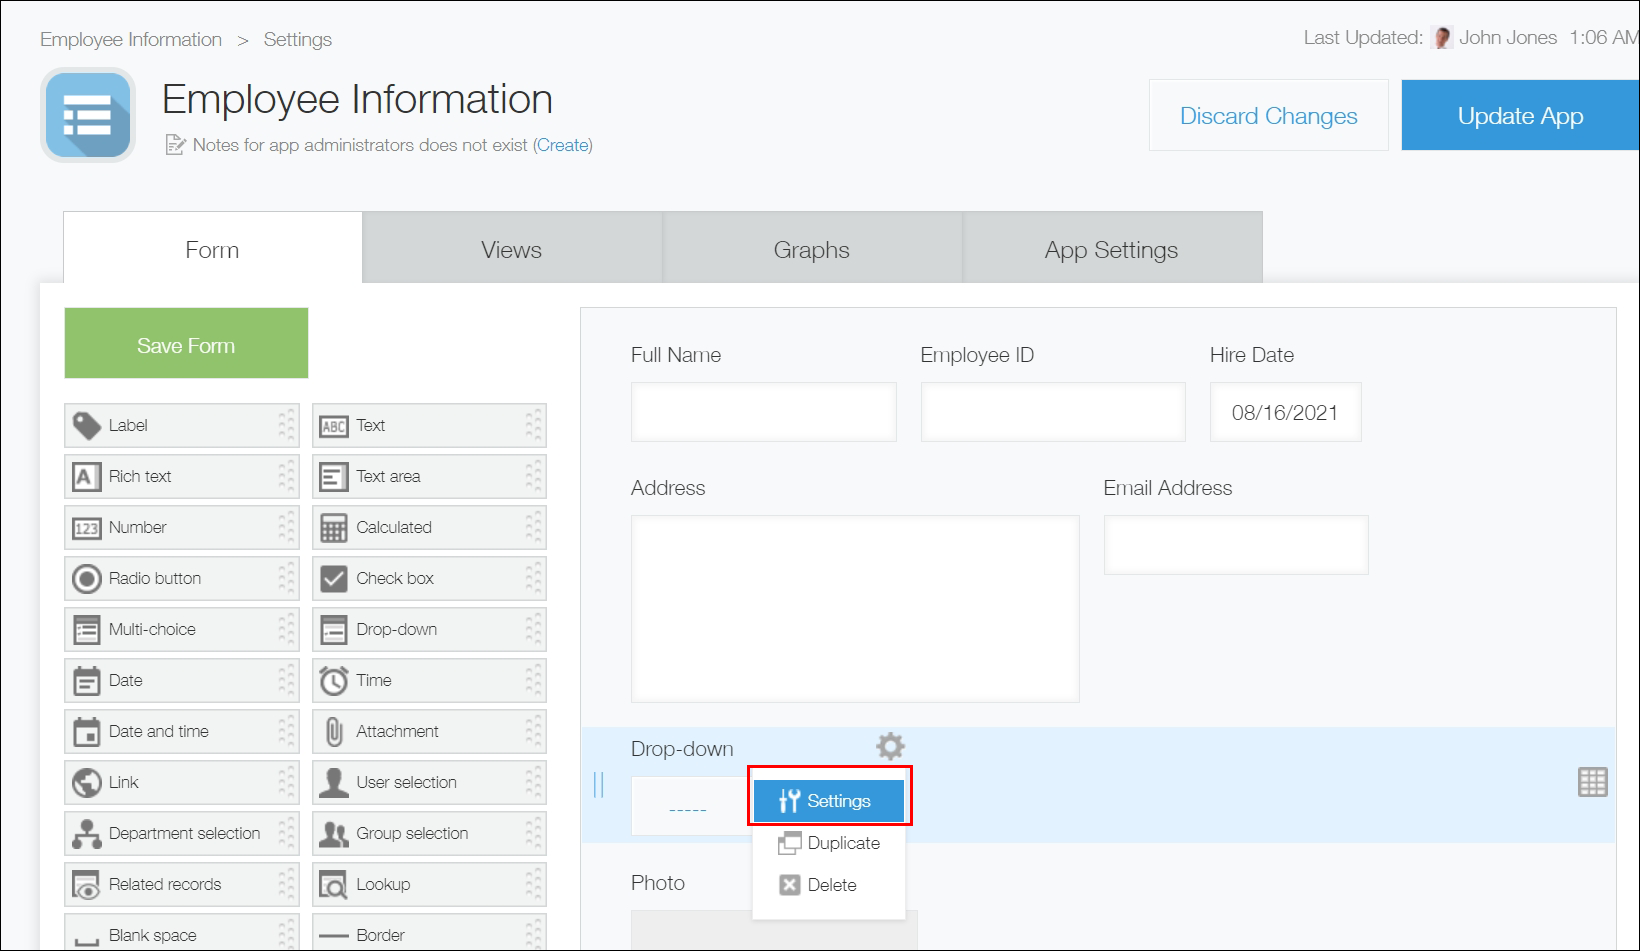
-
Enter "Department" in the Name section.
-
In the Options section, click the plus sign-shaped Add icon to the right of an input field to add another input field. After that, enter "Sales Department", "Development Department", and "HR Department" into the fields respectively.
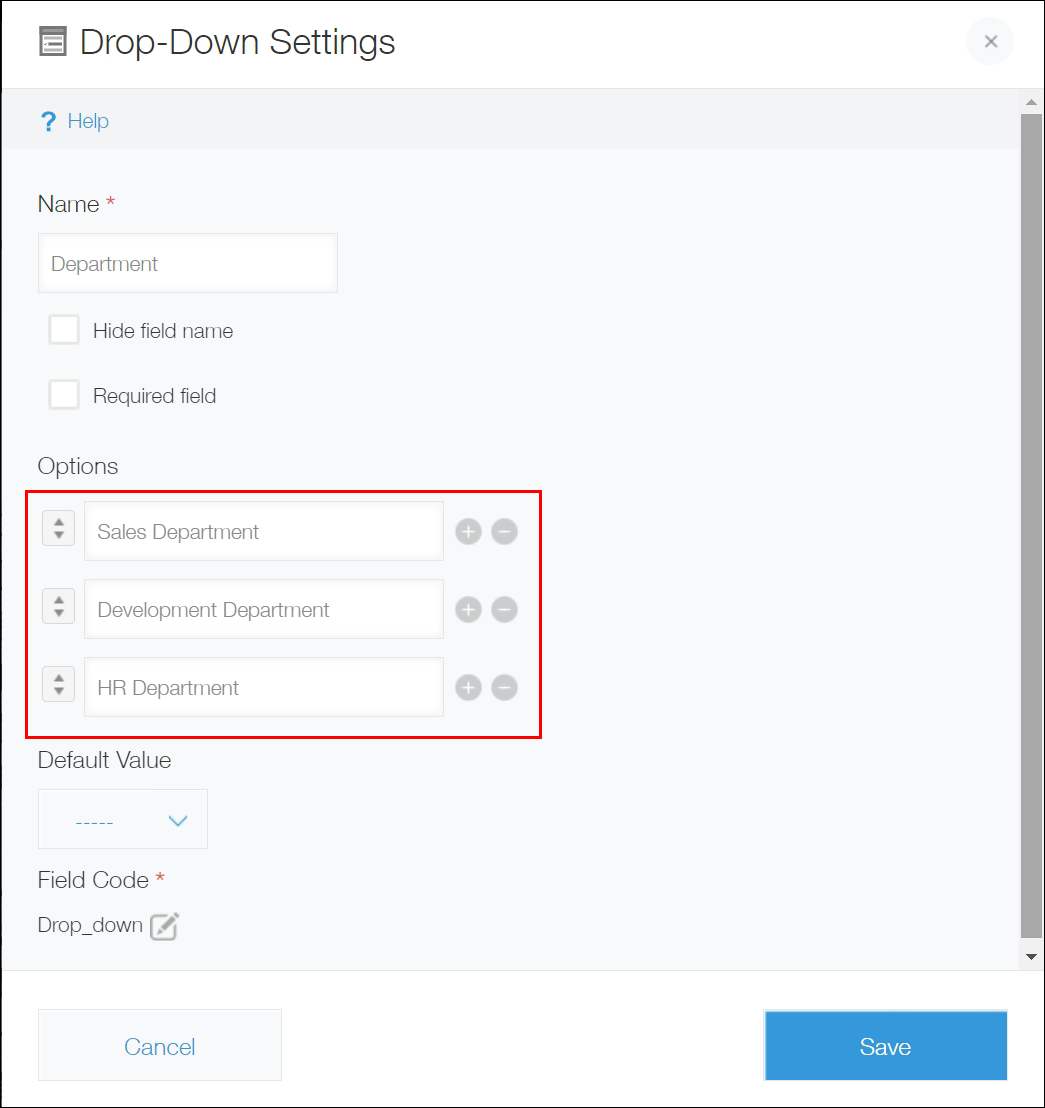
-
Click Save.
-
Click Save form on the upper left side of the screen.
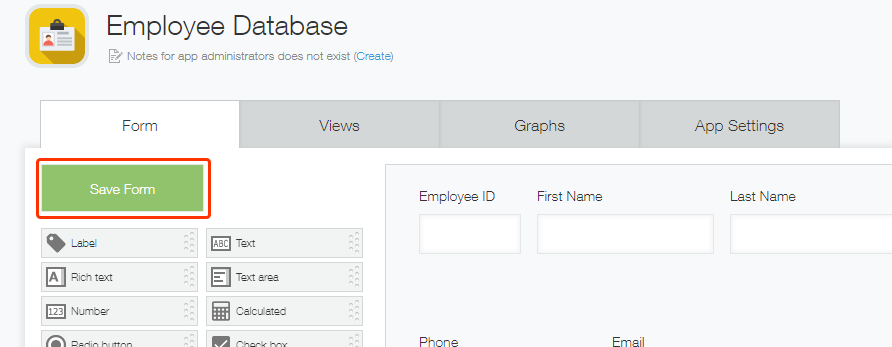 The form settings are saved. At this point, the app is not updated yet. You can redo and save the settings as many times as you need.
 -
Click Update app on the upper right side of the screen.
A confirmation dialog appears. The dialog lets you check the list of settings that will be updated by the action.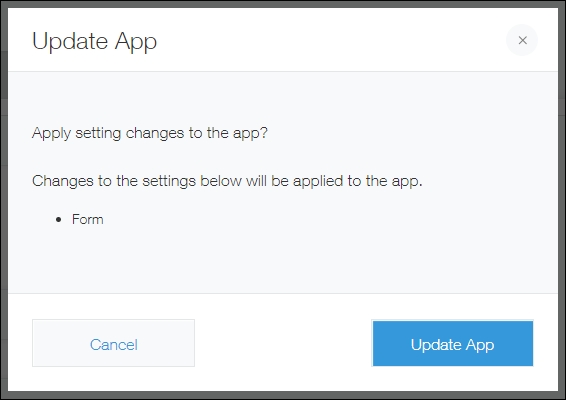
-
Click Update app.
Setting changes are now applied to the app.
