Designing process management
Configuring your process management settings can get a little complicated.
To ensure a smooth setup, it's recommended that you understand your workflow and plan your process management before setting it up in kintone.
Try visualizing the workflow you want to set up by mapping it out on paper or using tools like PowerPoint or Excel.
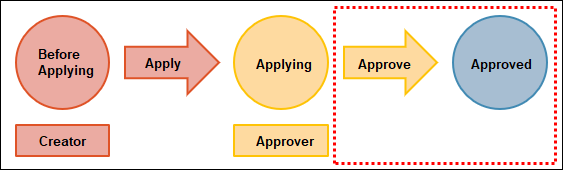
As an example, the following image shows a visualization of an application-to-approval workflow.

Workflow
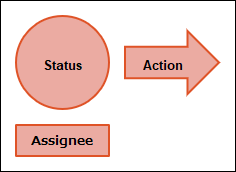
When you visualize your workflow, make sure that statuses, assignees, and actions can be easily differentiated.
-
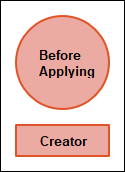
Define the first status and who you want the initial assignee to be.
The initial assignee should be either unspecified or the user who created the record.
Example:- Status: Before applying
- Assignee: User in "Created by" field
-
Define the next status and the next assignee.
Example:- Status after action taken: Applying
- Next assignee: Approver
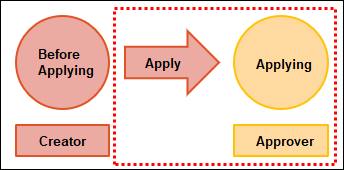
-
Set the button name for the action that advances the first status to the next.
Example:- Action: Apply
- Action: Apply
-
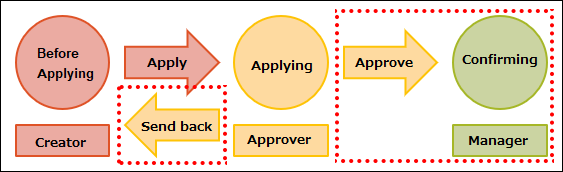
Repeat steps 2 and 3 as many times as necessary for your workflow.
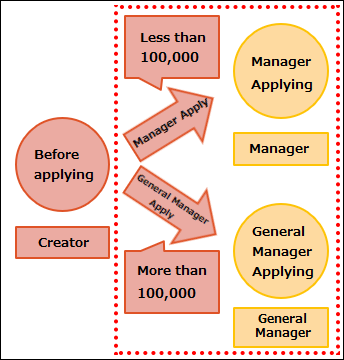
Example of a workflow where a request can be sent back or passed to the next approver:
Example of a workflow with conditional branching:
-
Once your workflow is finished, set a button name for the final action and name the final status.
The final status does not need an assignee.
Example:- Action: Approve
- Final status: Approved
Process details
Process details should be configured for each status.
Make a list of the statuses in your workflow diagram and write down the assignees, conditions, actions, and next statuses for each status.
Workflow diagram
Status settings
- First status: Before applying
- Next statuses:
- Applying
- Approved
Process settings
First process
- Status: Before applying
- Assignee: User in "Created by" field
- Conditions: None
- Action: Apply
- Status after action taken: Applying
Next process
In this example, we'll configure the process for the "Applying" status.
- Status: Applying
- Assignee: Approver
- Conditions: None
- Action: Approve
- Status after action taken: Approved
The final status has no assignee or action, so you don't need to include its details in your list.