Disabling two-factor authentication
Describes how to disable the two-factor authentication.
Disabling certain user's setting
This section describes the steps to temporarily disable the two-factor authentication, for example, when users lose their mobile device used for the two-factor authentication.
If the administrator disables the setting, information on the two-factor authentication that the user has set will be deleted. To resume using two-factor authentication, users must enable the two-factor authentication again.
Enabling two-factor authentication
If the administrator disable the two-factor authentication while the two-factor authentication is required, the user will be asked to configure it again at the next login.
Configuration steps for two-factor authentication when requested
-
Click the gear-shaped menu button in the header.
-
Click Users & System Administration.
-
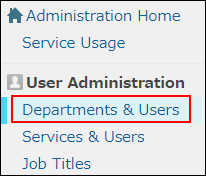
Click Departments & users.

-
In the search box, enter the display name or login name of the user to find the target user.
You can also expand the department tree and select the target user. -
Click the Change button.

-
In the "Two-factor authentication" section, click Disable.

-
On the confirmation screen, click Disable.
-
Click Save.
If you want to stop using two-factor authentication
This section describes how to stop using the two-factor authentication.
For example, you can perform this operation to change cybozu.cn login method to single sign-on using Identity Provider (IdP).
-
Click the gear-shaped menu button in the header.
-
Click Users & System Administration.
-
Click Login.
-
In the "Two-factor authentication" section, clear the "Allow users to use two-factor authentication" checkbox.

-
Click Save.